
I have been thinking about the flooding in Houston, and all the other devastating ways the planet is adapting to our carbon in the air, with changing weather patterns, intense storms, different water patterns. Thankfully, my sister and other family members in the Houston area are safe. Meanwhile, we have drought here in Maine. It hasn’t rained for over ten days. I don’t have answers for what to do about the new reality of flooding in our land, but I thought I could talk about what we are doing to address drought here in Maine.
So, last week, we were able to finish the rest of our rain barrels! One of the useful aspects of rain barrels is to preserve water in the landscape to be able to weather the ups and downs of water flow. We now have rain barrels gathering the run-off from each roof on our land.
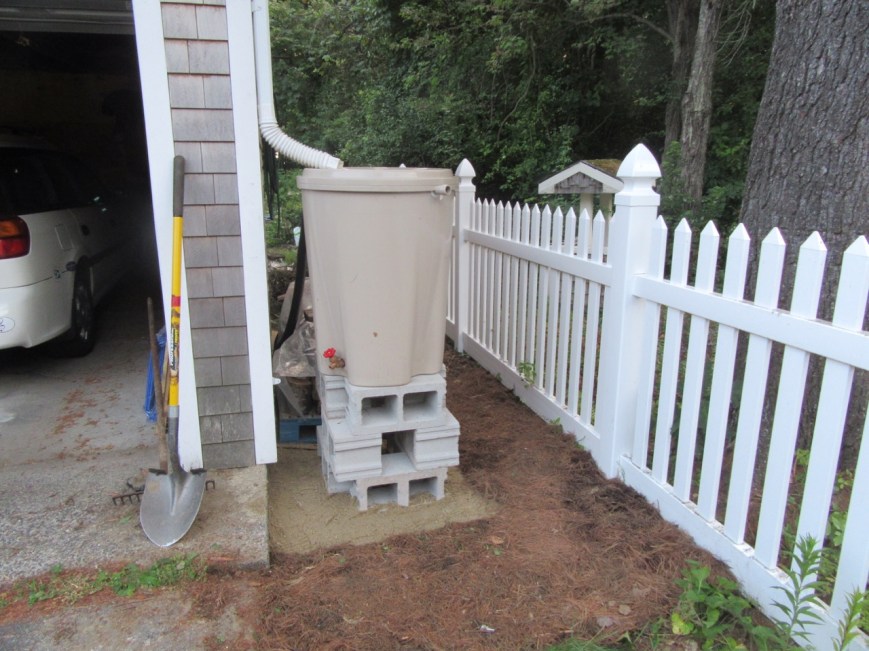
The final rain barrel is finished!
 I want to post about the learning session that Dave led on the 23rd to finish our rain barrels and teach a few of us more about how to install rain barrels. I will talk today about how to attach the barrels to the downspouts of our gutters. Once the rain barrels themselves are positioned, you can measure and mark the downspout about 8 to 12″ above the top of the barrel.

Then remove the downspout by unscrewing the fastening screws on the wall and to the gutter. Once those are unfastened, you can pull the vertical downspout apart from the connectors to the gutter.

The fun part is cutting the downspout itself to the right length with tin snips, using both right-handed and left-handed snips. (Right handed are red-handled, and left are green.) The basic idea is to mark the downspout with a pencil line all around, and be aware of the part you are going to keep, and the other part which will not be part of the finished downspout (the scrap side–but you can save it for other uses.) Then punch a hole with the point of the snips near your line, but in the scrap side, and start cutting around the marked line. But, also, about an inch further into the scrap side, you start another cut, so that you can work both those cuts at the same time. It makes it easier to go round the downspout. If you are right-handed, you use the right hand snip for your “good” cut, and the other snip for the helping cut. This picture shows a left-handed person making the good cut. As you go around the pipe you can cut off that little strip so it doesn’t get in your way.
Once the downspout is cut, you reattached it to the gutter, and reattach the screws, or make new ones as needed to attach it to the wall. Then, attach a plastic downspout extension piece that you can buy at a hardware store in large or small sizes, and position it to end over your rain barrel (see first picture). Hurray!
