Pond Water Plants

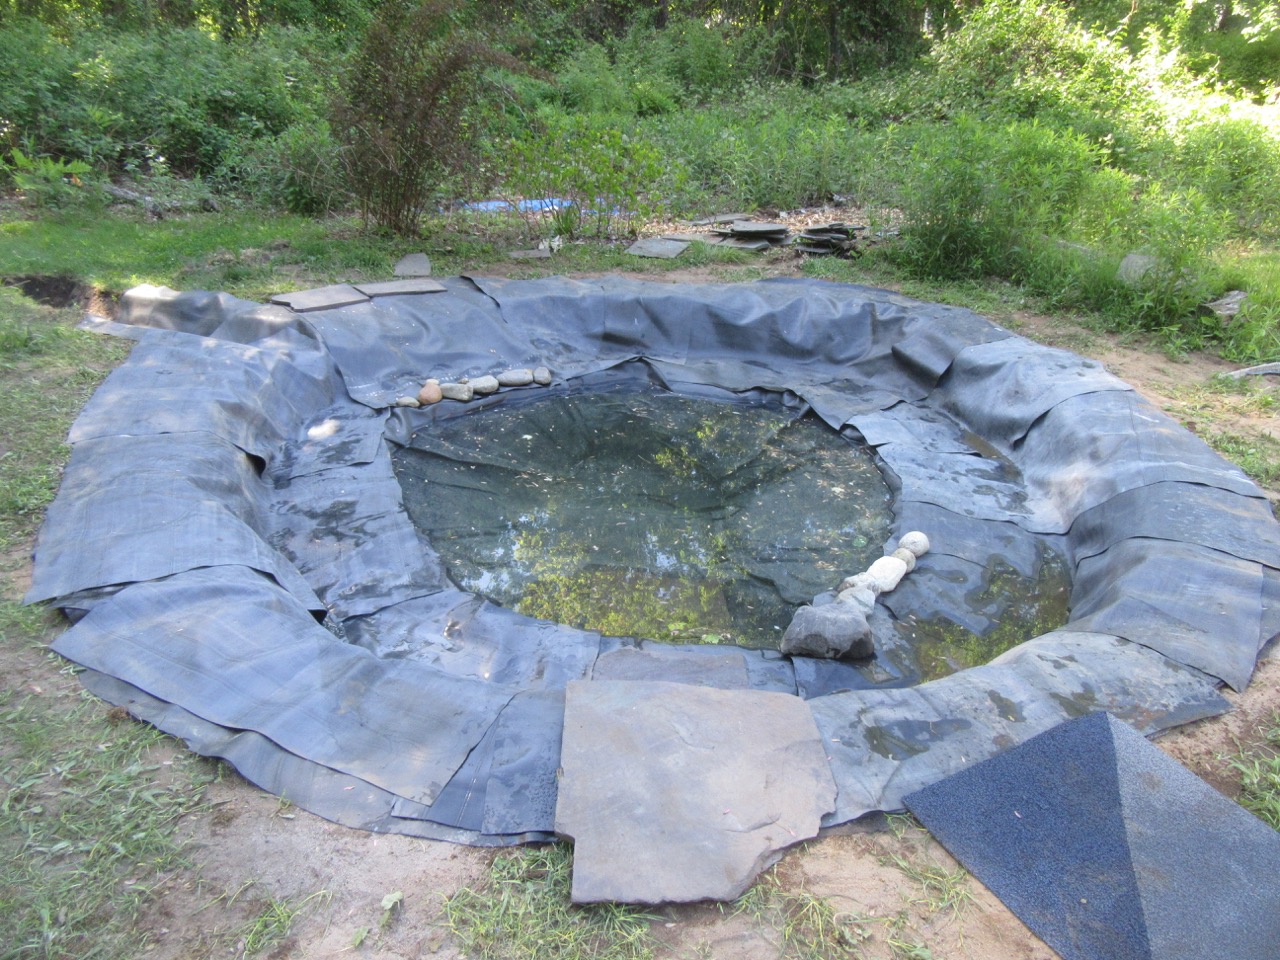
Photo: Pond with new plants, and also pine pollen covering the whole surface.

This morning I was up at sunrise, which seemed such a sacred time to finish filling the pond! While the hose was running, I planted several plants that I had previously purchased, and then added three ferns from our yard. Sometimes, I just had to sit and watch, amazed at its coming to life in this way.

I used our city water from the outdoor spigot because the rain barrels nearby were empty from yesterday’s filling. City water is less ideal because of chlorine, but the chlorine will evaporate quickly, especially in our 90 degree sunny weather today. Plus it is being intermixed with the water already there. I filled it until it just started to drain into the overflow channel. Hurray! The overflow channel worked.

The method I used for planting was that recommended by Robert Pavlis in Building Natural Ponds. No soil, just anchor the roots of each plant with some stones. That meant rinsing off the plant roots from the soil they were packed in. I added some more stones in one area because the recommended depth was less than what I had. Here are the plants I planted:

Photo: Sweetflag

Sweetflag was first. It was a bit unclear whether this was Acorus calamus, or Acorus americanus. Online where I purchased it, it was listed as Acorus calamus (Americanus). I was hoping to buy the plant native to here (americanus); the other was brought by Europeans, but naturalized, and then it was also used by Indigenous people. I learned the Passamaquoddy name for this plant in the class I took. Kiwhosuwasq, (which now can refer to either plant). It means “muskrat root,” because the muskrat would eat it, and it was an important medicinal plant.

Next I planted Cardinal Flower, or Lobelia cardinalis, which will have a bright red blossom that is beloved by hummingbirds. It is a native plant. Both Sweetflag and Cardinal Flowers will grow tall, so I placed them toward the back of the pond, across from where we tend to sit.

Photo: Cardinal Flower

The next plant is Arrowhead, or Sagittaria latifolia, which is a shorter plant. It will have white flowers. When I rinsed off its roots, it divided into two plants, so I planted them near each other. It is native plant, but also an aggressive grower so I placed it on the narrower planting ledge where it can spread out on its own. I hope that all of these plants will spread out to fill their areas, but also make room for each other. The goal is to cover half the water surface with these plants on the planting ledges.

Photo: Arrowhead plants
Photo: Blue Eyed Grass

I had two pots of Blue Eyed Grass, or Sisyrinchium atlanticum. This one is also a smaller plant, and in the spring it blooms early with delicate blue flowers. I placed it in the part of the pond nearest to where we will sit.

Because it is so late in the season, a number of the plants I wanted to buy were no longer available this year. I am hoping I can find some Marsh Marigold sometime. (Calthus palustris.) It is another shorter plant, with spring blooming bright yellow flowers.

I was able to purchase a hardy white water lily, on Etsy. (Nymphaea spp.) The hardy variety of lilies can survive the winters in Maine, especially if their roots are deep in the pond. They sent me two root tubers. They arrived in my mailbox on one of the hot days, and were warm when I opened the package, so I hope they will be okay. But I planted them in temporary pots filled with stones, and placed those pots on the planting ledge. When they get bigger, I will move them lower in the pond. Water lilies are important parts of a natural pond, partly because their pads cover the surface of the water, providing shade and inhibiting algal growth. Plus, maybe frogs will sit on them. But for now, they are tiny.

Photo: Water lily in pot

After planting all these, I found two types of ferns among the many growing at the back of our yard, dug them up, rinsed off their roots, and planted three of them in the pond. I tried a few different ones–one tall, one small, one mixed, to see which might transplant best. A friend has offered me some Blue Flag Irises from her pond, so I’ve saved a space in my plan for them. Of course, now the question is, shall we try to buy some more plants to fill in more space right away, or wait for these to grow into larger versions of themselves? In the meantime, by 10 a.m. I had to come inside to get away from the heat, so all future parts of this project have to wait. Maybe this evening, we’ll just sit by the side of the water and enjoy.
Pond Stones, Stones, Stones

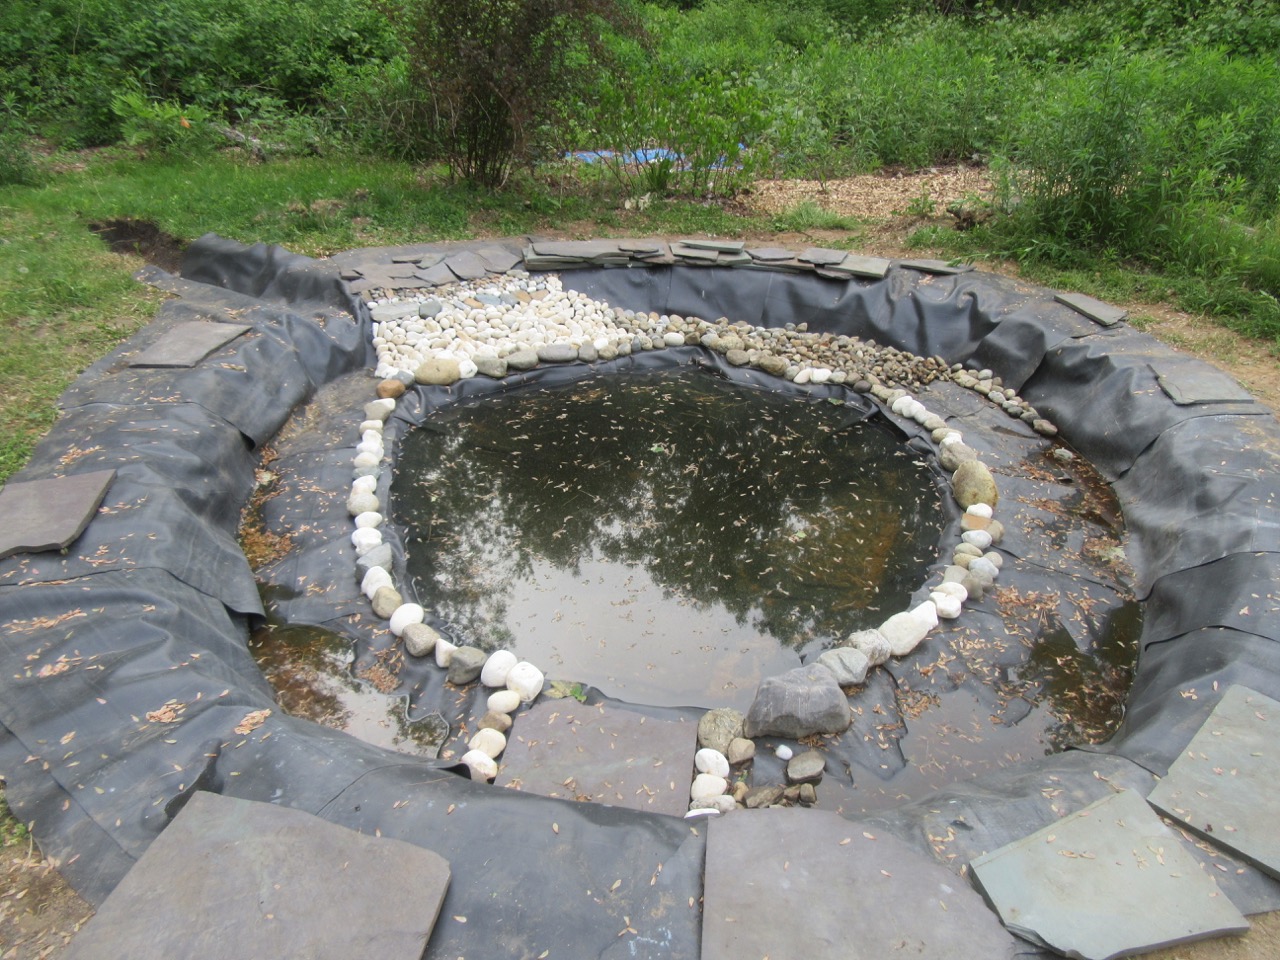
Finding stones for the pond project is proving to be an adventure. It is raining here today, and was yesterday too. The days before that I was able to place all the stones I had previously gathered onto the pond planting ledge. I also bought some white stones in small bags–they were supposed to be 3 to 5 inch stones, but at least half were much smaller than that. Maybe not such a great buy. But I had enough to finish a ring around the center of the planting ledge. These stones will be large enough to stabilize smaller stones behind them. Once the pond is filled, all of them will be below the water.

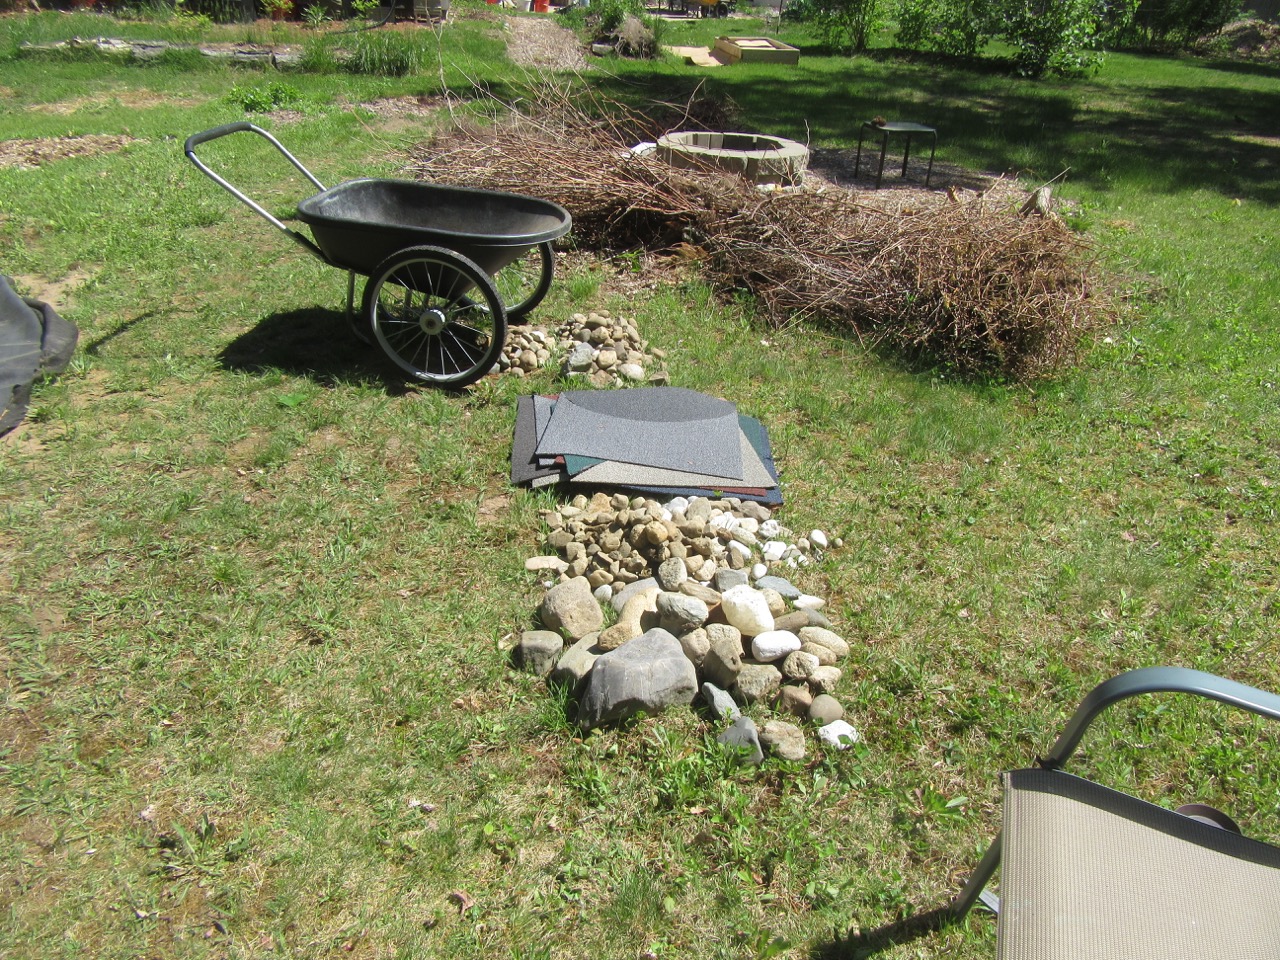
Pond with stones in a ring around the ledge, plus “beach.”

I worked on the “beach,” which is an incline for critters to be able to reach the water easily. I did it early in the process because It seemed like this might be the trickiest part, and I wasn’t wrong. In the photo it is at the back, with mostly white stones. I had gently placed each stone one by one. However, I am thinking I might need to redo the upper part of it because when I imagine little critters walking on those stones, it seems like they are not stable enough–the incline being slightly too steep. But to redo it, I’ll have to move the upper stones, and go beneath the liner and the carpet, and take out a bit more soil so the slope is more gradual. When the pond is filled, the water will cover the white stones and come to the level of the row of larger stones behind them.

Close up of pond “beach”

After I finished the (imperfect) beach, I put all of my smaller stones on the ledge to the right of the beach. As you can see in the first photo, they didn’t cover very much. So I will have to buy more small stones for the planting shelves, but I am now looking at 1-2 inch round stones, not “pea stones”. I discovered that a nearby nursery has such stones available in bulk–but that means either borrowing or renting a pickup truck to be able to collect them. I can get a half-yard of them for a good price, which should do it. It is just a big project to rent a truck, get stones, unload them at my house, and return the truck. I don’t mean to complain! If anyone locally (Portland Maine) has a pickup truck (with an open bed) who is willing to loan it, can you let me know? For some reason, this part feels challenging to me.

So, in the meantime, last night I suddenly had an idea of where I could find some more bigger stones. In our old neighborhood there were rural roads with no houses nearby, and I thought I remembered seeing stones on the side of those roads. Today before the rain came, I drove over there with two intentions. Get some stones, but also, look to see if the lady slipper plants we use to find in the woods there were still blooming. And they were. And I did get some good stones by the side of the road! I have a feeling this gathering of stones will continue for some time.

Pink lady slipper

Pond decisions

Sometimes the mental work is as hard as the physical work of building the pond. If you’ve been following along with this project, you know that after digging the hole, after putting down old carpet to protect against invasive bittersweet roots, after placing the underlayment and then the pond liner, we started filling the pond with water a few days ago. That felt so great! But then I felt stuck. The Building Natural Ponds book, by Robert Pavlis, which has been such a great guide to this whole project, suggested using old carpet as an “overlayment” on the planting shelves, to protect against the stones that were to go there. But I had run out of most of the carpet, and also had misgivings about putting old carpet into the actual water of the pond. So what to do?

I thought and thought and then posed the question in two Facebook groups–the Building Natural Ponds group and the Northeast Permaculture Network. Then, I went outside and started gathering all the stones I’d been saving for the last five years from around the yard. I had some in five gallon buckets, and some in a pile next to the garage where violets had decided it was the perfect place to bloom. I had to dig under the roots to get all of those stones. But violets are very prolific in our yard, so I wasn’t worried about them. I also brought back the final bits of carpet I had–2 by 2 squares made of eco-friendly nylon.

Photo: Gathering all the stones to use in the pond.

Once that was done, I came back inside and checked my Facebook posts. I had gotten a variety of answers and suggestions from folks, and finally came up with my answer. I would use extra pond liner as an overlayment. Robert Pavlis had thought that idea would work well, so that gave me the confidence to do it. Some folks didn’t bother with any overlayment, but it gives just that added layer of protection against cuts or punctures from stones or little animal claws. So I went back outside, and I bravely made the first snips to cut off the extra pond liner around the edges of the pond. Because the pond wasn’t quite as deep as originally planned, there was quite a bit of extra liner.

Photo: extra pond liner

I started cutting it up and laying pieces of it all around the planting ledge, starting with the spot that I hope will be a little incline “beach” for animals to be able to approach. And as it happened, I had just enough liner to cover everything I needed. Then I started putting some stones into place. I did that in bare feet, and an old carpet square worked as a place to wipe off my feet before getting onto the planting ledge. We had some slate pieces that we found here when we first moved here, so I am hoping to use them around the edges of at least part of the circle. But I am also trying out using them for steps into the pond. Once the pond is full of life, it will be slippery, so maybe not. Decisions for later.

Photo: pond with liner overlay done, and stones begun to be placed.

I worked into the late afternoon, but finally came inside for another commitment. Today I am feeling all that work in my body–sore hands, sore muscles. I am eager to continue laying the stones I have–and then I will see how many more I will need. More decisions. The basic idea is to put larger stones around the center of the planting ledge, and larger stones near the outer ring of the planting ledge, then pea stones to fill in–those will be the growing medium for bacteria that clean and filter the water and aquatic plants that clean and filter the water. But as with this whole process, I am taking it step by step. I think if I had really known how much work it would be, I might not have had the temerity to begin. But here I am.

Pond, Water!

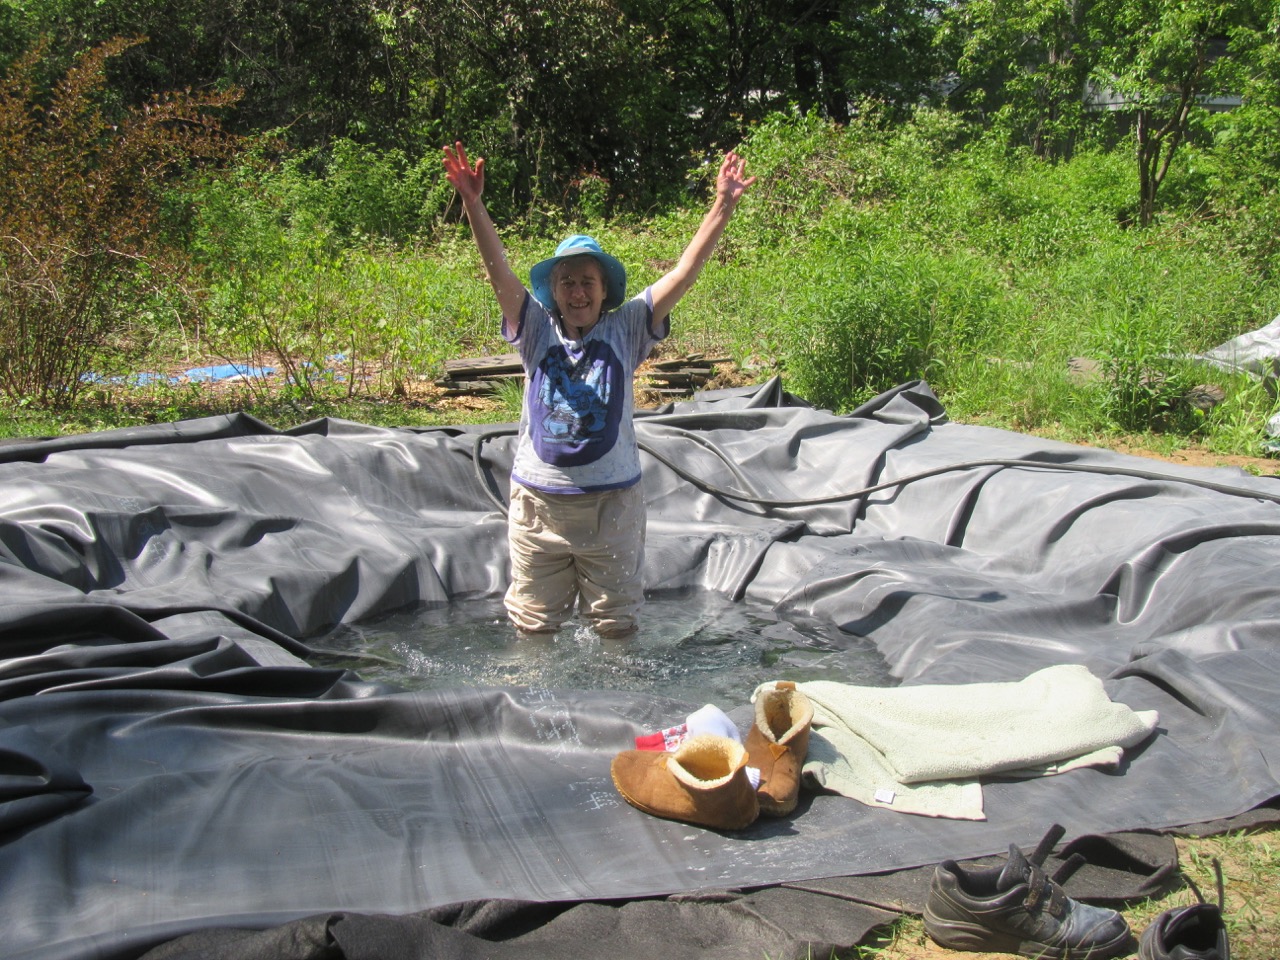
Photo by Margy Dowzer: I am in the water as we fill the pond!

Such an exciting moment when we began to put water in the pond yesterday! It was a sunny hot day, so being in the cold water was great. I found I had to get right into it to do the folds of the pond liner which are necessary when you take a square liner and put it into a round hole. We filled it up to just under the level of the planting shelf.

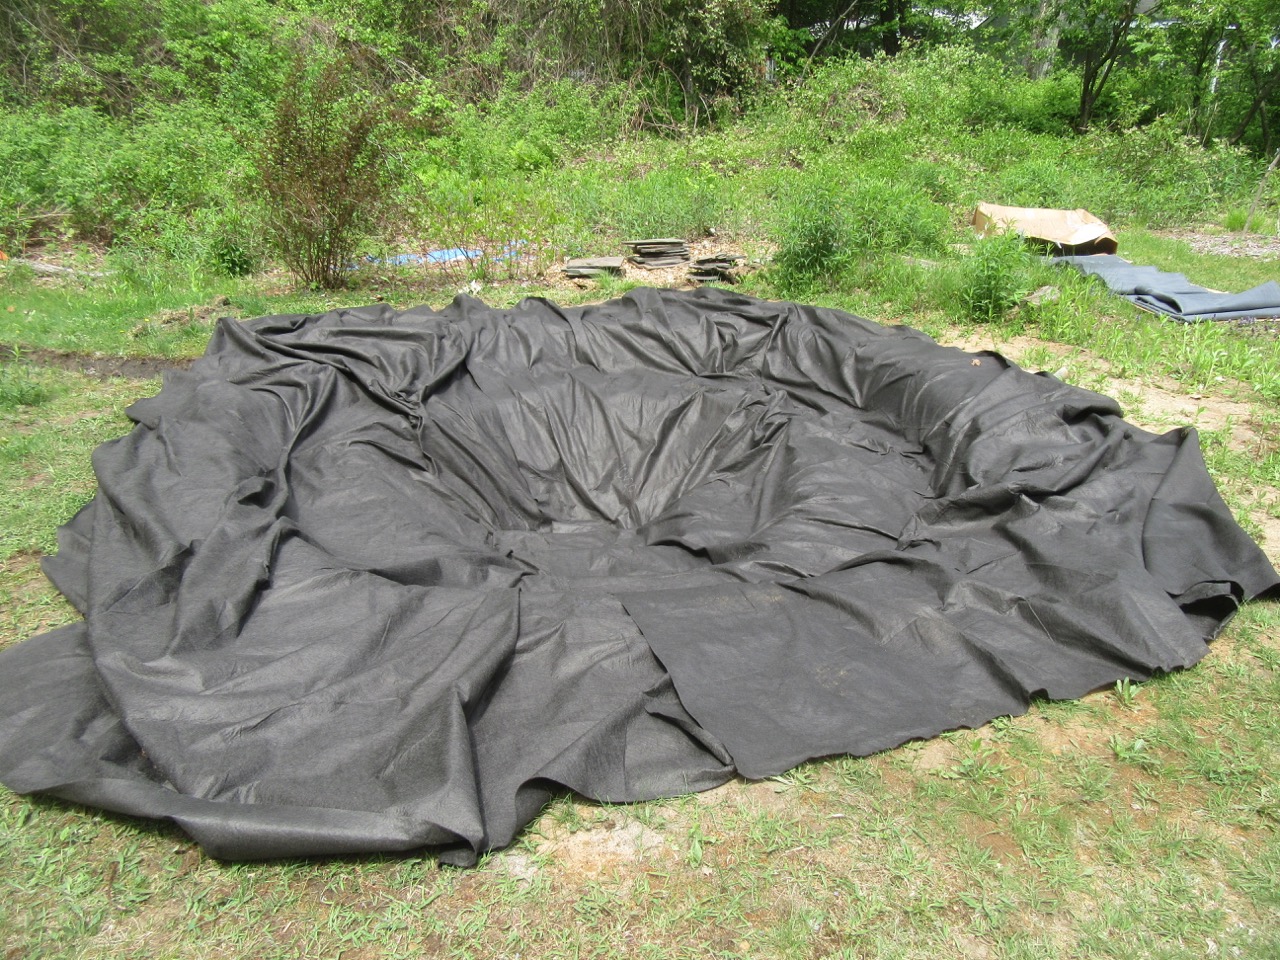
Photo: black cloth underlayment

But back to the earlier parts of the process–the first thing I did yesterday was install the pond liner underlayment–a very light felty fabric thing that protects the pond liner. We might not have needed it, because of the carpet strips, but the pond liner is guaranteed for life if you use the underlayment. I had purchased a 20 by 20 foot 45 mil EPDM liner, and the underlayment came in two pieces of 10 by 20. I overlapped them about 3 feet. After that, I also dug further and deeper on the overflow channel, and made sure it sloped away from the pond. You can see it in the left on the photo.

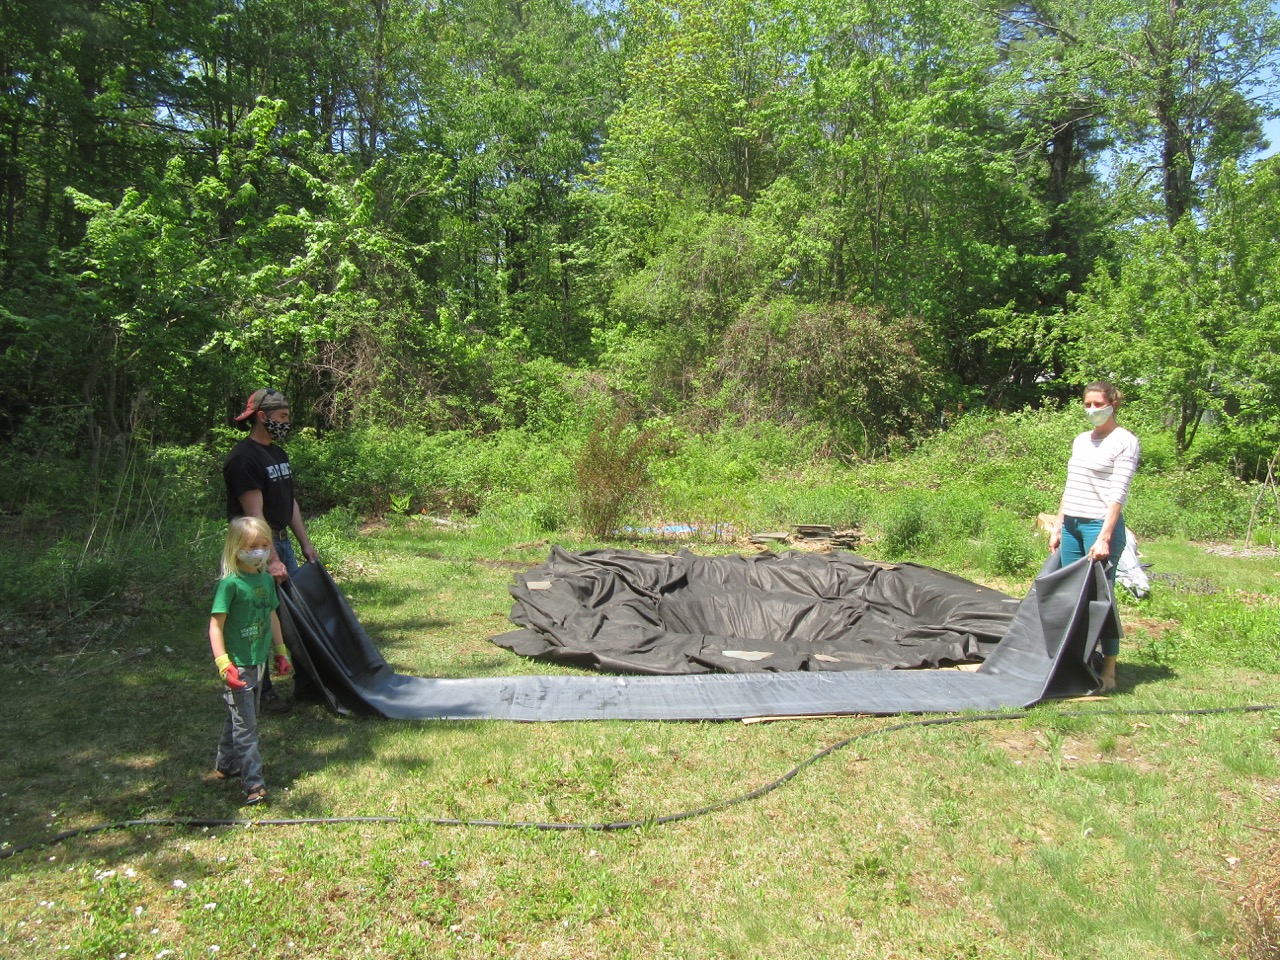
Then, midday, our neighbors came by to help with installing the pond liner itself–the liner is very heavy, but with the three of us (plus a kid!), it wasn’t hard to position it over the hole. So grateful for helping hands! Because the pond wasn’t quite as deep as planned, I knew we’d have extra liner on the sides, so we didn’t have to worry about getting everything exactly centered.

Photo: getting in position to install the liner.

As it turns out, black rubber gets very hot in the sun, so we all wore gloves, along with our masks for COVID.

After the liner was roughly in place, the neighbors went home. I got into the hole and adjusted everything so it was flush with all the surfaces underneath, creating folds where needed. It was recommended by my Building Natural Ponds book to not step on it with shoes, but socks weren’t enough to protect my feet from the heat–so I pulled out my fuzzy slippers and a blanket.

Photo by Margy Dowzer: Taking a moment to rest while shaping the liner to the hole.

After a short break, we started filling the pond with our garden hose. Water from the house has chlorine in it, but the chlorine will evaporate quickly and so this water is fine to use especially before we have any life in the pond. Eventually, we’ll use water from the rain barrels you can see in the back of the photo, but we’ve had no significant rain for a while. While the hose was running, Margy and I wandered around the back of the yard looking at plants, and then finally pulled up chairs to watch the water fill. And I got in a few times to keep adjusting the liner–glad to have an excuse!

It isn’t the end of the process by any means. I have been doing this step by step, not knowing how long each step would take. The next thing to do, and why we only filled up to the planting shelf, is to cover the planting shelf with stones and pebbles. I’ve collected lots of rocks from around the yard, but will definitely need to purchase more. And that is a bit more complicated than I realized, likely involving borrowing or renting a pickup truck. But in the meantime, I went online and ordered 5 native pond plants that will arrive in about 10 days. It is really happening! And there is water in the pond!

Pond, carpet layer

Photo by Margy Dowzer: me working inside the pond, surrounded by pieces of carpet.

Yesterday, I laid down all the carpet pieces to cover the ground surface of my little future pond! (I got these pieces from kind strangers when I posted on Freecycle and Buy Nothing that I was looking for old carpet for the pond.) It was a bit like putting together a puzzle, making sure to overlay the pieces so all the ground was covered. As I mentioned before, this is one method for protecting the pond liner from roots and sharp stones–in our case, mainly from bittersweet roots. The toughest part was matching up square pieces in a circular area. That, and the dustiness–which is why I am wearing a mask and gloves. I used up all my pieces of carpet, except for some 2 by 2 squares that I plan to use over the liner on the planting shelves, to protect the liner from those stones. It was just right–I would have hated to have a bunch of leftover old carpet.

Photo: carpet layer completed!

Today, I still have to dig some more of the overflow channel, install the official “underlayment” that came with the liner, and then some neighbors are coming over to help me position the pond liner–it is too heavy for me to move it on my own. I am trying to get it in place before some rain in the forecast on Saturday, though we did get some drizzle this morning. I’ll post more pictures as the work gets done.

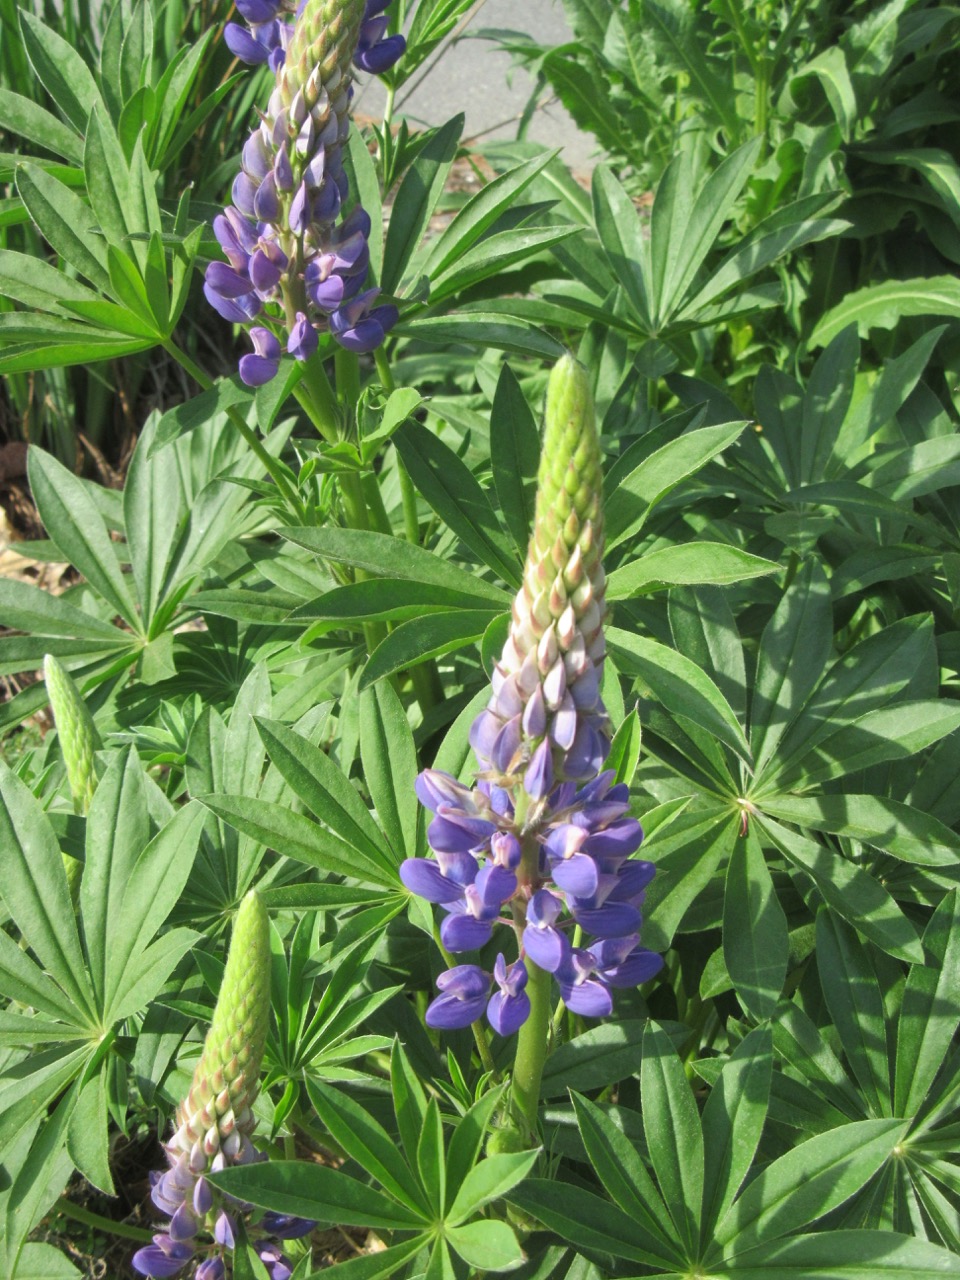
Meanwhile, these beautiful purple lupine flowers started blooming in our front road edge, with no work at all from me this year, and I just want to include them here, for anyone who’s reading this far. May you have a beautiful day!

Photo: Lupine flowers

Pond Dig, part 4

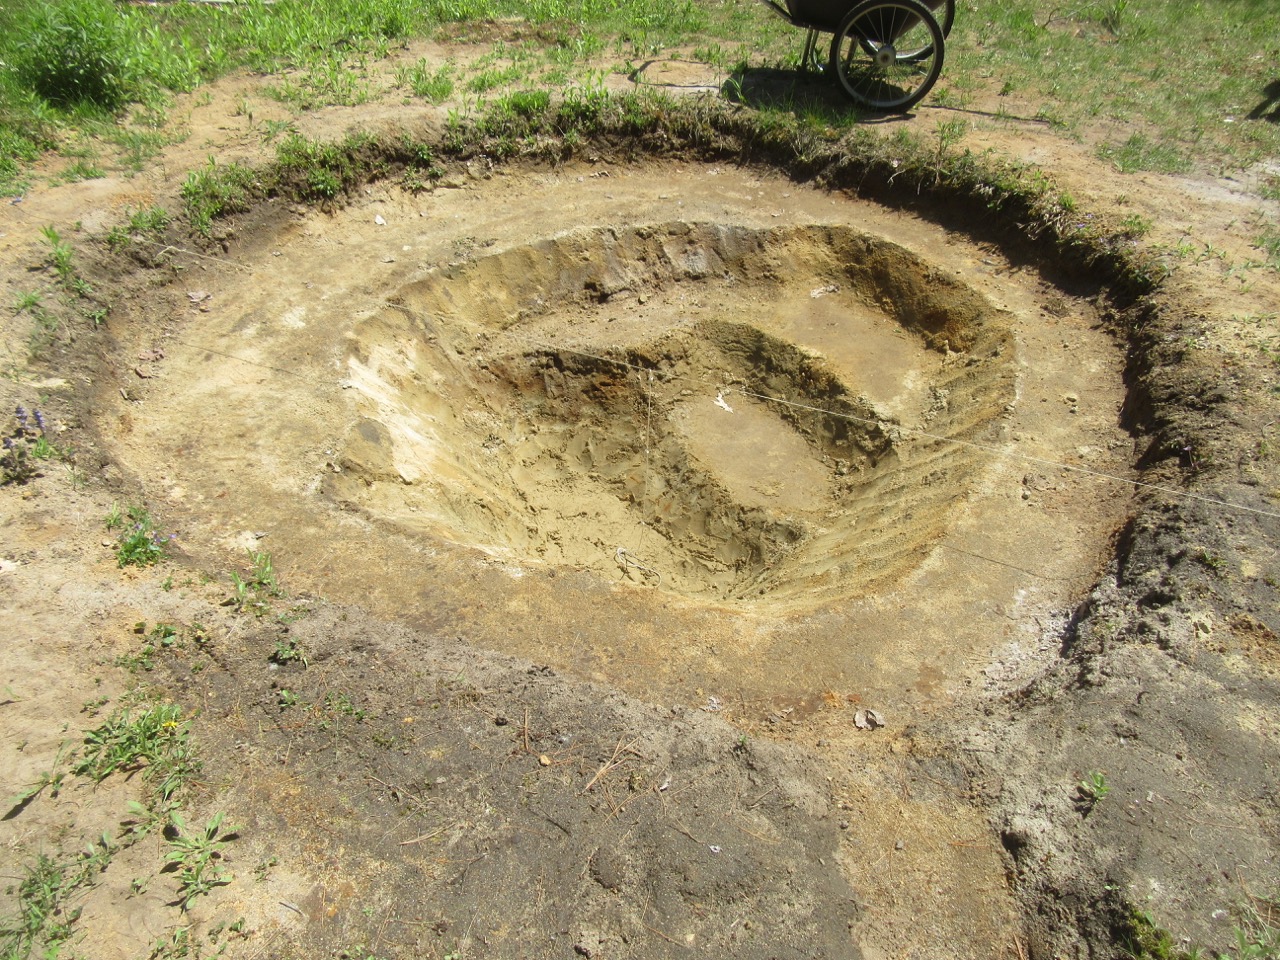
Photo: Pond, fully dug, with four levels and a measuring line across

Hurray! I’ve been back to digging the pond the last couple days, and today I finished the bottom layer! I hit clay soil at about 2 1/2 feet down, and went a little deeper in one spot. For those who were wondering about the water that showed up in the bottom, I learned, after consulting other folks, that it’s probably not really a bit deal. It might possibly lift the liner in the spring a small amount, but on the other hand, the water in the pond might have enough weight to counter that. In any case, over the last several days of not much rain, there is no standing water, though the soil I’ve dug out has been damp.

So I ended up with four levels: first level all around the edge for planting (at about 10 inches down), second for a step, plus another spot to plant pond lilies, third another step down, and fourth the very bottom. The bottom is about 2 ft. 10 inches feet deep, though more like 2 1/2 feet from the top of the water once filled, since there is an overflow channel about 4 inches down from the top. I decided to let the clay soil be my guide for stopping at that depth. The very thin white line you can see across the pond is my measuring-depth-device–a string anchored in the ground at each side, and then another string looped onto it, marked with knots at each foot, and weighted so it hangs down.

It has been a lot of hard work to do the final levels, because each damp shovel-full had to be carried up the steps to the top step to put it in the wheelbarrow. And then, when I wheeled it all to the mound where it was going, I had to shovel it onto the mound. (Eventually I will add compost to the mound, and plant some sort of ground cover.)

Photo: Mound where I put the dirt, to cover old demolition waste, then put cardboard on top, then more pond soil.

The next step will be to cut old carpet into strips, to layer over the ground to keep roots from coming through, and to protect the pond liner. And surprisingly, there were small bittersweet roots all the way down to the bottom level. I have a pile of old carpet that I collected from willing volunteers (via Freecycle and Buy Nothing) last week, that is sitting on the patio, waiting for me.

But for now, I am coming inside to rest, with sore muscles but a happy heart. It has been so satisfying to be digging down into the beautiful earth, imagining a place for water.

Prayer for Pollinators

Peach and two cherry trees

If you’ve been following my work on digging the pond, I will mention that I took a little break, first to find out what to do about the water that has seeped into the bottom, and then because I twisted my ankle on Friday while I was digging. So annoying! My ankle is not so bad–after a couple days of rest, I can hobble around now, and I will be digging again soon.

In the meantime I wanted to share this photo of the flowering peach and cherry trees in our food forest. They flowered a bit earlier this year than last. In the photo, the peach blossoms are pink, and it is hard to see the white cherry blossoms amid their green leaves in the photo. But they are so beautiful! There are more cherry blossoms this year than last, when we got just a few.

However, I’ve been concerned about pollination. Our neighbor keeps honey bee hives, and usually we have lots of her bees visiting over here, drinking nectar and drinking water from our bird baths. But this year, it has been very sparse for bees. I found out that our neighbor’s hives died in a cold snap earlier in the spring and she hasn’t replenished them yet with new bees.

One day, I did see bees of all sizes in the Lapins cherry tree (on the right in the photo), but I didn’t see them in the peach tree. (Not that I sit and stare all day.) But I’ve been doing so much TLC with the trees this year, with Kaolin clay, and holistic foliar sprays. It would be a shame if we didn’t get fruit because of pollination problems. It is too late now to try to hand-pollinate. The other potential glitch is that while the Lapins cherry is self-fertile, the Black Tartarian cherry needs the Lapins to cross-pollinate. They are both sort of blooming now, but the Lapins had peak blooms earlier, and the Black Tartarian has new blooms that just came out yesterday. So we wait and see.

It reminds me of the sad danger to pollinators everywhere because of climate change, environmental pollutants, pesticides, and development. All of our human food is dependent on these little creatures who pollinate the plants. If the bees die, so do the humans.

Today I pray for the pollinators, with gratitude and humility. Part of this prayer is offering to the bees so many other plants in our food forest: daffodils, dandelions, and violets are blooming now; soon we will also have chives, oregano, clover, thyme, and many more. All of us can do more to provide food for bees and other pollinators throughout the season. Only then can they also provide food for us. May this circle of life be blessed.

Pond Dig, part three

I had a helper yesterday for digging the pond. My friend Sylvia came by in the afternoon and the very first thing we did was drag the pond-liner in its box from near the house to back closer to the pond. (You can see it in the picture, behind the wheelbarrow.) That would have been enough help all by itself–so heavy! But then we took turns digging, hauling, and resting nearby. We got a lot done, and also enjoyed a rare COVID-time visit, walking around the yard and in the woods, looking at birds and plants.

Sylvia standing on the planting shelf, while digging in the pond!

So here is what the pond looks like now, in layers. The first layer down, about 8-10 inches, is for the planting layer. The next layer down, maybe 18 inches, is for a step layer–part of that I might take away as we go along, but some will remain to be a step into the pond going forward. In the middle, we dug to about 2 feet down, as measured with this string set-up I created. My aim is to go three feet down in the middle.

Pond layers dug out.

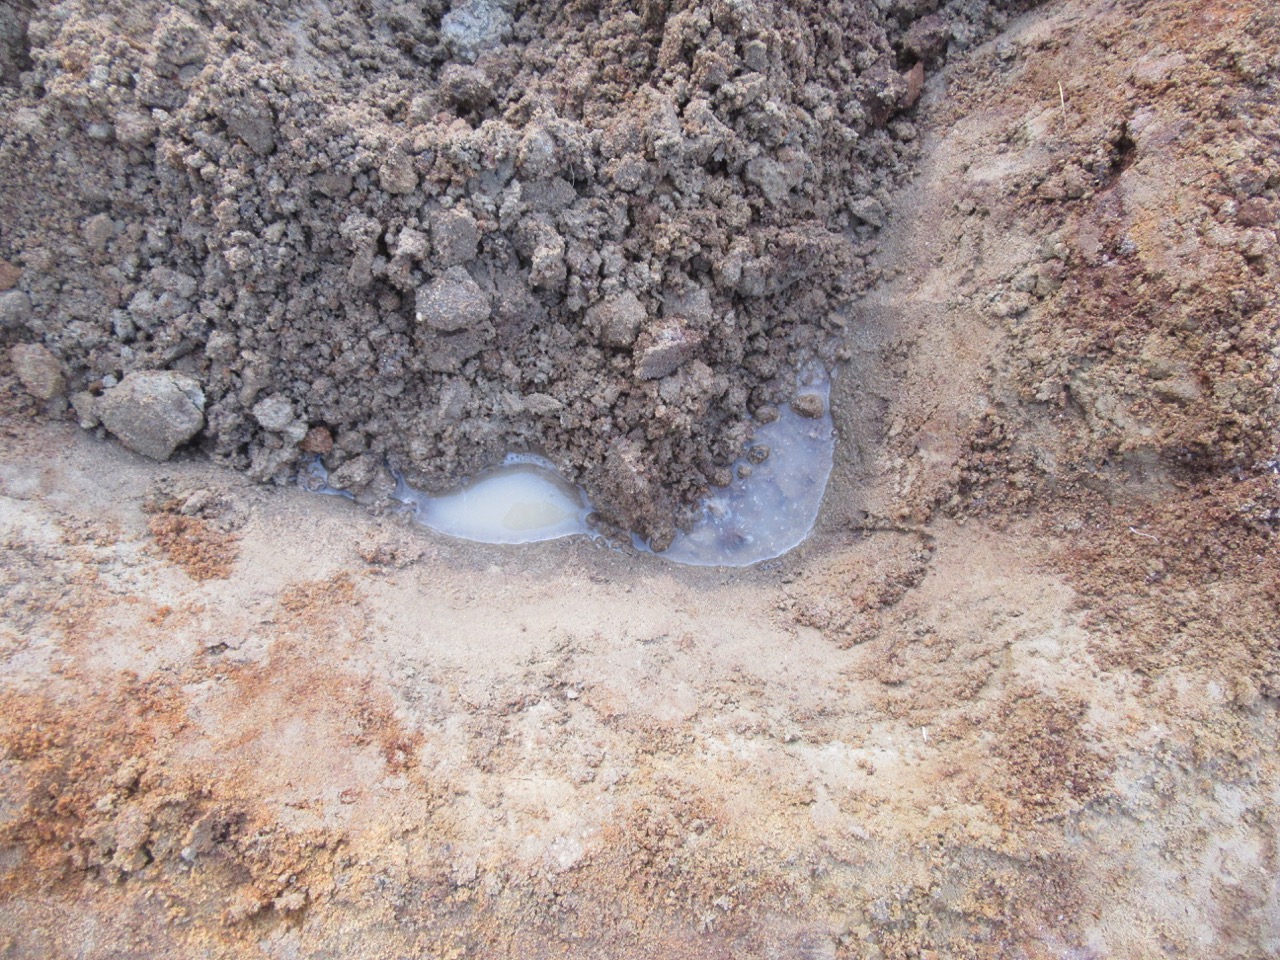
But then we came upon a problem that wasn’t mentioned in the Building Natural Ponds book by Robert Pavlis. Water started to seep up from the sandy soil. We are actually at the time of year when vernal pools abound here in Maine. We have a ditch way back behind the edge of our property and the properties next door that fills during spring rains. And we had an inch of rain last week, though generally it has been a dry winter. Does this mean we can’t go any deeper for a lined pond? Or do we need to wait until it is a bit dryer as the days go by? Will it mess up the pond to have water under the liner at the bottom? Or does it not matter at all? I am going to ask my questions in the Facebook group Building Natural Ponds, and see whether I might find some answers.

Water seeping from the soil in the bottom of the pond.

Maybe the pond just wants to be a pond so badly, that it doesn’t want to wait, lol. Meanwhile, I am going to rest today from digging, and more rain is coming tomorrow. So we will see. If you have any wisdom about this, I’d love to hear from you.

Spring Energy

The first dandelion of the season! We love dandelions and so do the bees.

Wow! It feels like spring is finally here. Last week was a flurry of activity in our yard, and I had the energy to do it! And it was warm and sunny! We had a timeline. On Tuesday, all day I was sifting the remains of the old compost pile, and putting it everywhere–in the new raised bed, on the hugelkultur mound, the asparagus beds, under many of the fruit trees, the old potato patch, and an area near the baby apple trees in which I hope to plant zucchini this year. We have had to sift the compost because roots had worked their way into the pile from the edges, including invasive bittersweet which we do not want to spread around the garden.

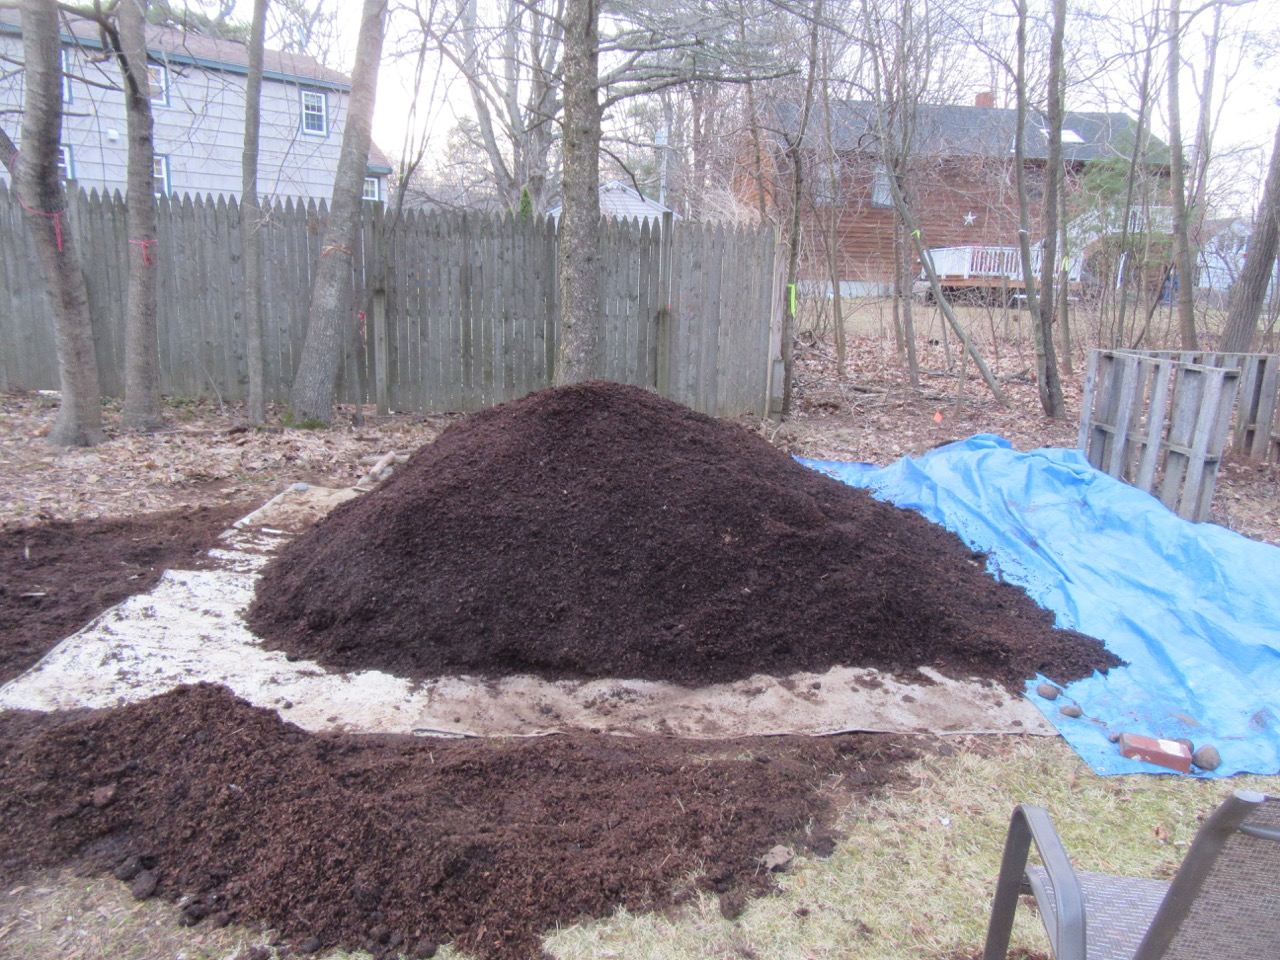
The goal was to completely empty the pile, because on Wednesday we were getting a new four cubic yards of composted manure from Wilshore farm. So I finished up Wednesday morning, and Wednesday afternoon we got our delivery. Then Margy and I were using shovels and rakes the rest of the day to slightly move that pile so it was all situated on top of old carpet, with at least a foot of clearance around the edges–so no more roots.

Composted manure on old carpet.

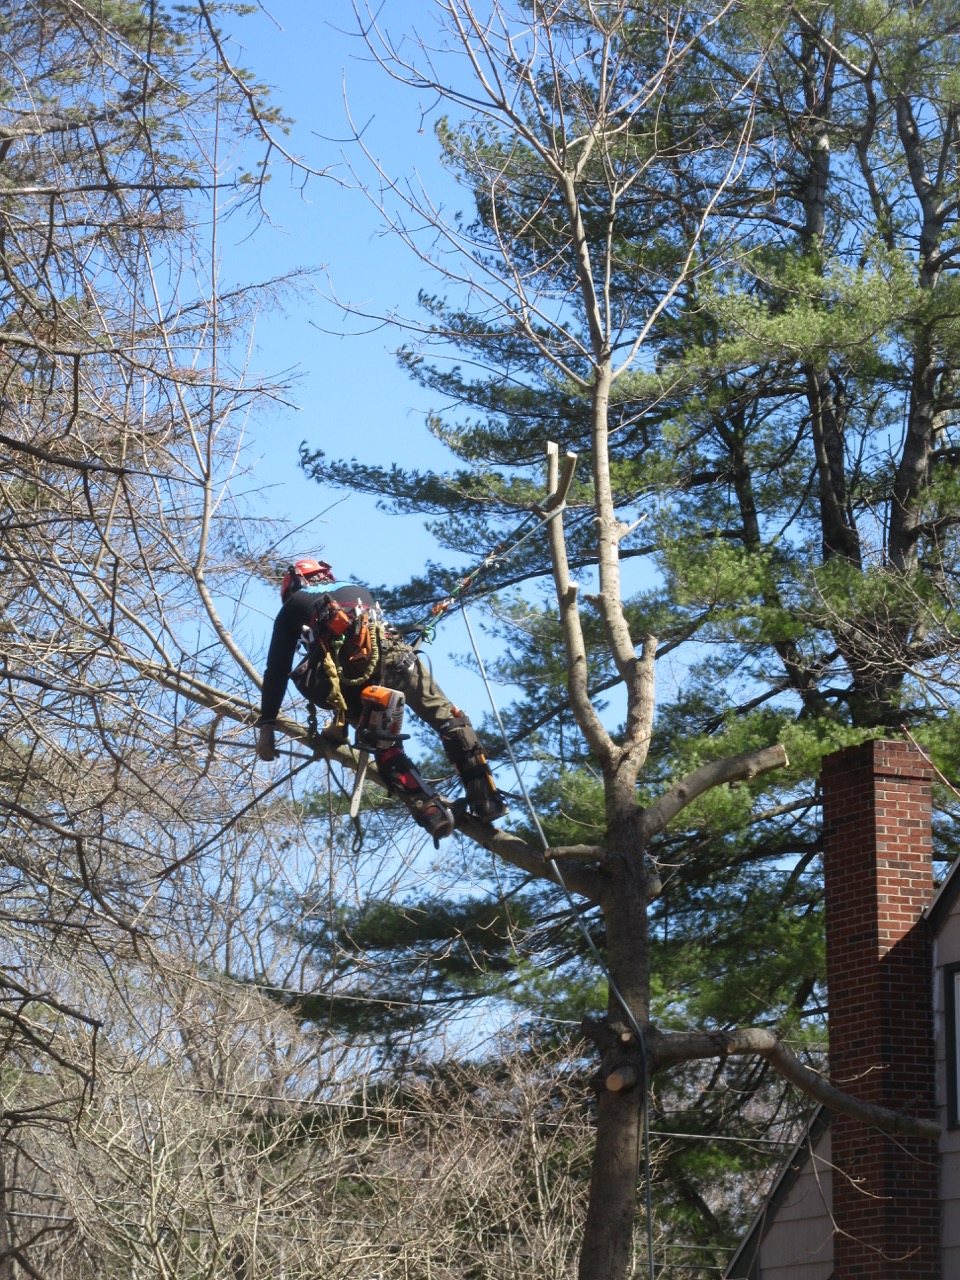
On Thursday morning, I finished up with what was on the edges, and spread the remains over the nearby grassy areas. On Thursday afternoon, Dan from Blue Ox Tree Service was coming to cut down three Norway maples along the fence between us and our neighbors. While we hate to cut down trees, we also have been trying to remove invasive plants, and Norway maples are invasive here. They grow like crazy and spread their seeds everywhere. Both Margy and I each had a moment with those trees earlier, to apologize for needing to cut them down, and thanking them for the shade they had given, and say goodbye. We let them know that their wood would stay in our yard to benefit the other trees in the garden.

Dan up in the Norway Maple

It was amazing to watch Dan climb the trees and with a system of ropes and pulleys balance himself on the tree, and cut it from within. We really like Dan, who has delivered free wood chips to our yard many times in past years. He is very tuned into permaculture, and told us he has an arrangement to deliver wood chips to Cultivating Community gardens this summer. In fact, our whole intense timeline of last week was based on the fact that he was going to leave us a pile of wood chips from the trees, and once that pile was there, a truck couldn’t get through to deliver compost where we needed it to be.

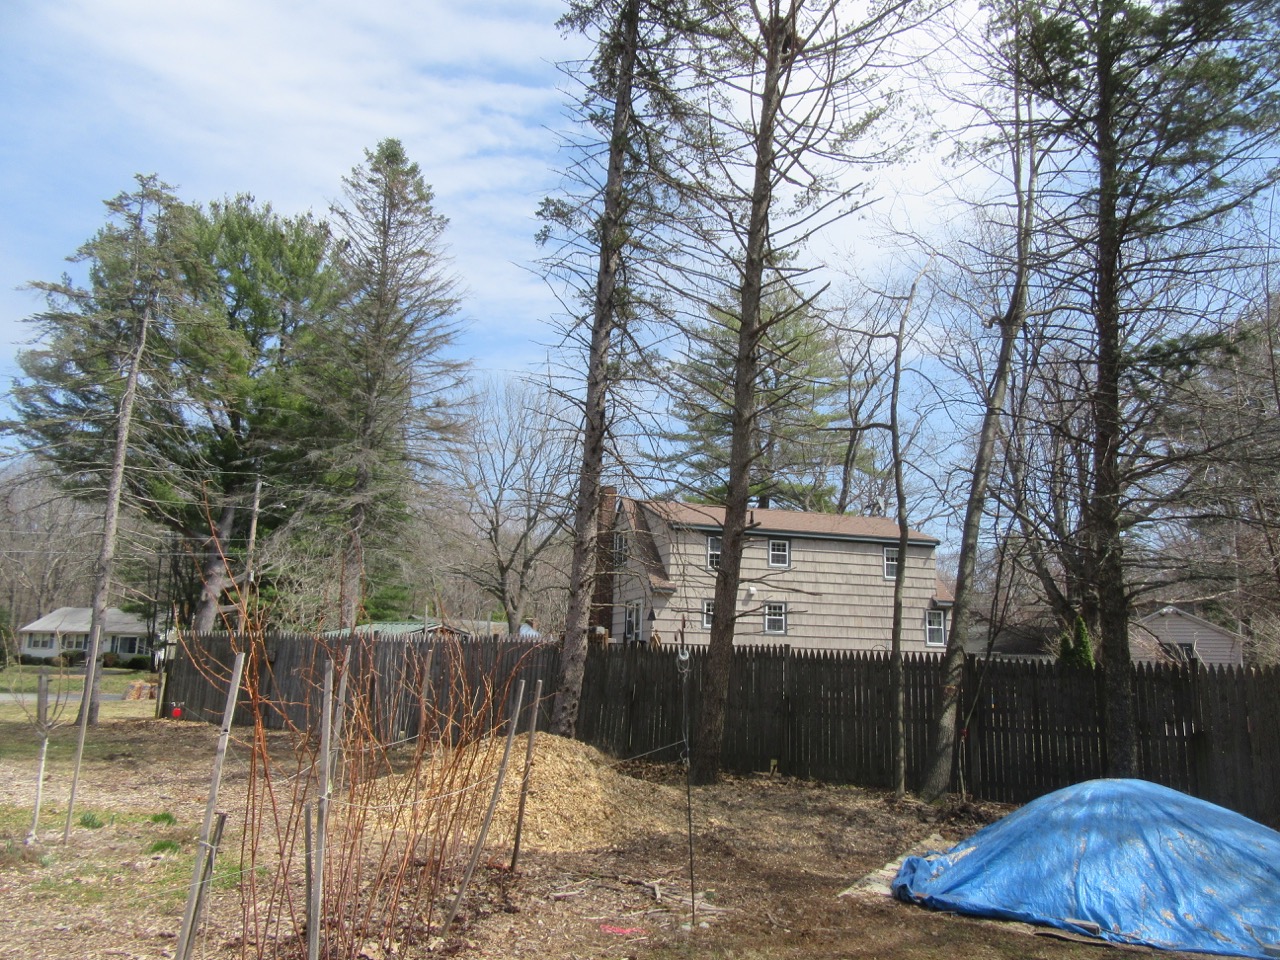
Wood chip pile on the left, compost pile on the right covered with blue tarp.

So here are our wood chip and compost piles, all set up for soil enhancement and mulching for the season. The area along the fence has opened up to offer more morning sun to the orchard–you can see four somewhat scraggy spruce trees remaining, plus a skinny red maple and oak near the right which will have more room to grow.

Now, the growing season is fully begun. I was amazed that I was able to put in so many hours of outside work each of those days–I am thinking it has something to do with the surging energy of the earth in spring, the warmth of the sun, and also with drinking iced licorice tea while I was working–a great herbal energy booster. I am remembering how exhausted I felt last fall, how much work the garden was during the long summer, and yet, spring brings new excitement and new energy, even to me with my chronic illnesses that can get in the way. May it be that way for you too!

Lessons from Other Beings

I feel a deep calling to learn from the other beings who share this earth with us. I was reminded of this calling by a new book I just started reading, Undrowned: Black Feminist Lessons from Marine Mammals, by Alexis Pauline Gumbs. She is observing dolphins, whales, and other mammals who live in the sea, and learning the wisdom they might have for human beings–especially for black women, but also for all of us. “They are queer, fierce, protective of each other, complex, shaped by conflict, and struggling to survive the extractive and militarized conditions humans impose on the ocean.” It is a beautiful and meditative book and I am so grateful. Reading a chapter each night has fed my soul, as well as helped me remember how key it has been in my own path to listen for the wisdom of other creatures–though the ones I learn from are usually closer to home than the sea.

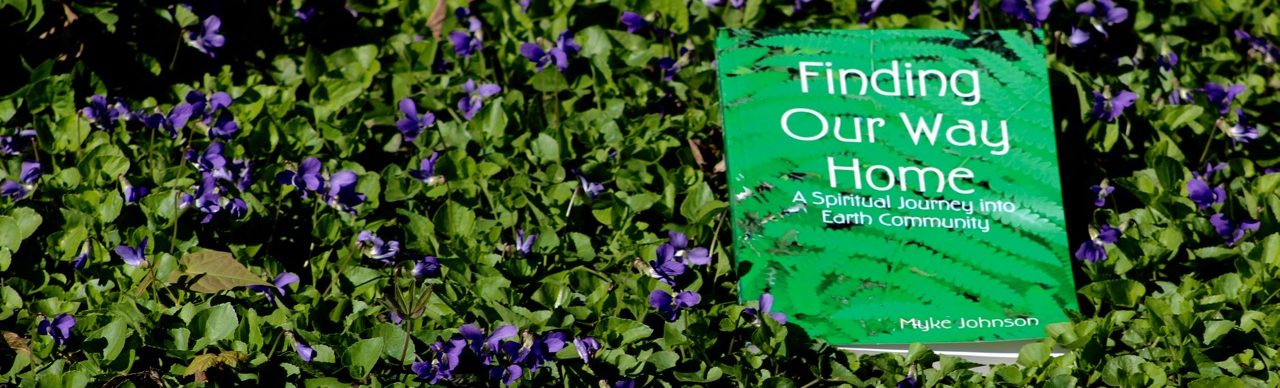
Yesterday morning, inspired, I began to read again my own book, Finding Our Way Home: A Spiritual Journey into Earth Community, remembering. I was remembering the many quiet moments I spent in my former back yard, listening to cardinals, watching slugs crawl through the grass, paying attention to trees, to stars, to the red light of dawn. It was a yard with many mature trees, a long row of huge lilac bushes, incredible privacy, and many critters who were our neighbors–turkeys, deer, birds, squirrels, chipmunks, and occasionally skunks. I was remembering how much those creatures taught me, when I was quiet enough to listen to them.

In our current back yard–we’ve lived here five years now–we can get caught up with work: pruning, planting, soil improvement, garden permaculture projects. It is land more in need of attention from us, ragged, more depleted, invasive vines and bushes clamoring around the edges and in the soil, imbedded in city life, though still surprisingly private once the trees on the edges leaf out. There is more room for gardening–the old place was too shaded by all those mature trees. So we have planted a little food forest, herbs and perennial vegetables, made room for hugelkultur and raised beds and even shared with our friends room to grow herbs and veggies.

But it is easy to get caught up in the work of it–a lot of work. It is easy to forget that other part–the listening to the land itself and the other creatures here, the plants and animals. I remember when we first found this place, feeling from it an unmistakable message: that through making relationship with this small piece of earth, I might learn more about what it means to be in relationship to earth and all her creatures. It was time to think small–right here I could find home, I could find earth community. The work is part of it–we are here to learn to be beneficial members of this tiny ecosystem. It has weathered much neglect and abuse from human beings in its history. But the work is not the only part of it–the listening is the most important part. Sitting quietly, watching, waiting. As spring makes it easier to be outside again, I am ready. I am ready to take my lead from what the land asks, what the land teaches.

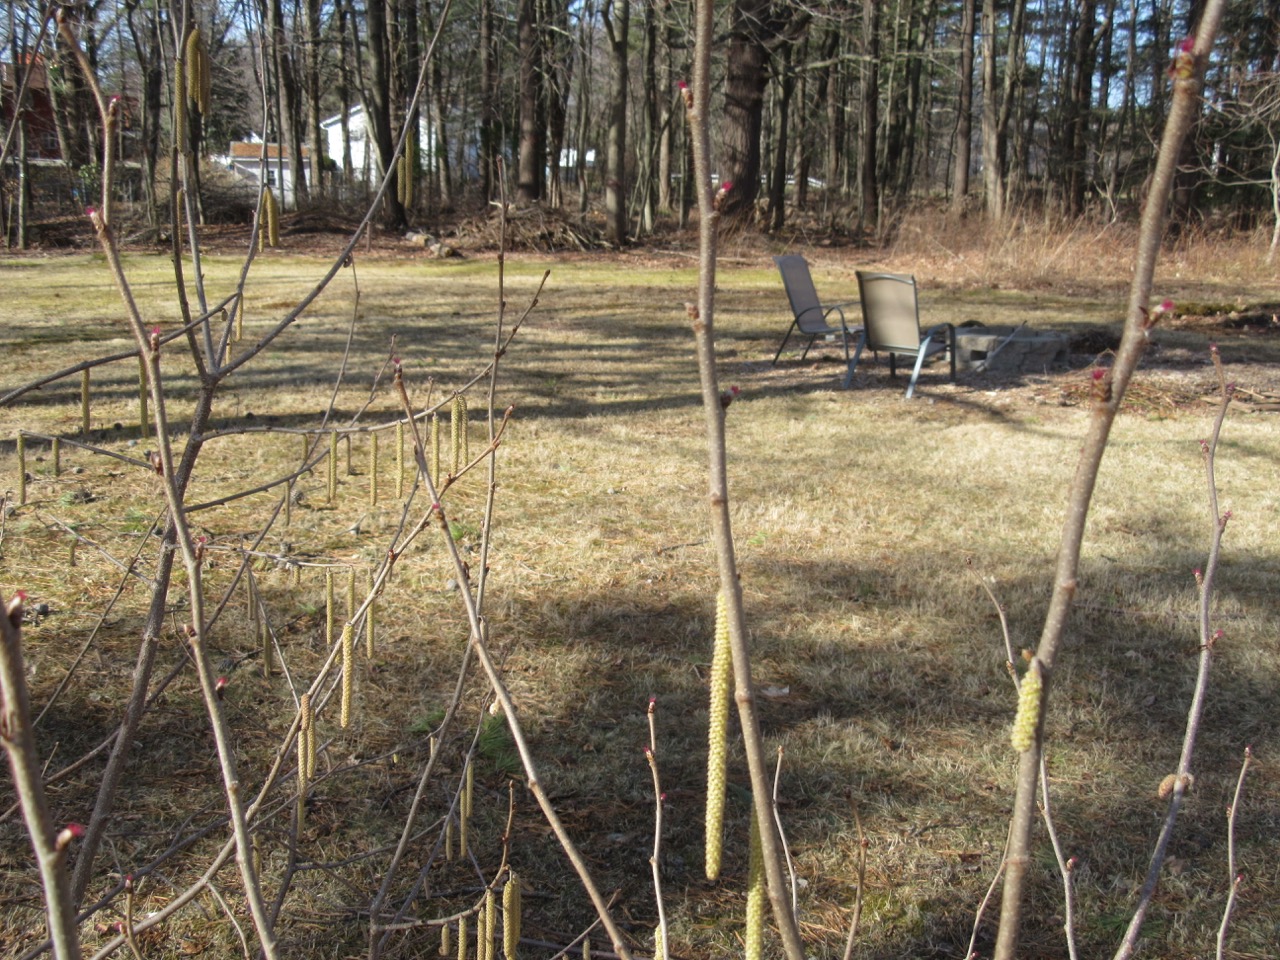
View of the back yard through hazelnut bushes with catkins.