Photo: Tiny frog sitting on a large stone at the edge of the pond
Today the frog in the pond let me take its picture! I came outside this morning and just sat for a while at the edge of the pond, writing in my journal and being quiet under a cloudy sky. It felt a little bit peculiar to be done with the work of building the pond. To let go of the strange obsession for finding stones that has filled the last several weeks. I have been working on the pond since April! I didn’t see the frog at first. I was glancing around at the yard, and all the ways that Margy and I get overwhelmed trying to care for the land. We are old, we are disabled, we are ignorant of the many needs of plants, just beginners. It is hard to be good stewards of the land. There is always more to do than we can do. So I make a decision to let go: let go of the burden of it, let go of the overwhelm, let go of trying to do more than we can. Here I am, it’s a new day: be amazed at life!
At some point, I decided to walk around the edge of the pond to look at how the plants are doing. And then I suddenly saw the frog, sitting quietly. No plops into the water, no jumping away. Just sitting quietly, paying no mind to me while I was also sitting quietly, and now walking quietly. (Perhaps it has figured out that we people who come to this pond are no threat–we can share the pond?) It was on a big stone at the bottom of the beach, with its eyes out of the water and its very tiny body in the water. Its head maybe a half inch long, its body another inch, long folded legs. It let me take its picture many times. When I walked back to my chair, this is how it looked from over there, almost invisible, but now visible to me:
Photo: Can you see the tiny frog on the mottled stone near the deeper water, five stones to the right of the red stone?
When I came back inside, I did more research, and this frog seems to be of the species called the green frog–the most common frog in our region-it can be green, olive, brown. (One site joked–close your eyes and think of a frog–that is the green frog.) It is likely a female, because the tympanum–the round “ear” circles behind its eyes–are the same size as its eyes. In males, they are larger.
UPDATE: I’VE GONE ROUND AND ROUND ON THE IDENTIFICATION OF THIS FROG. I WONDERED IF IT COULD BE A FEMALE BULLFROG, BECAUSE THE DORSAL-LATERAL RIDGES GO BEHIND THE EARS, RATHER THAN DOWN THE BACK. BUT THEN I REALIZED IT WAS MUCH TOO SMALL FOR A BULLFROG. I AM BACK TO THINKING IT IS A GREEN FROG. SEE THIS CAN YOU ID THE FROG SITE.
I sat with the frog for quite a bit longer, until some raindrops started falling on the water, on me, on the frog. I stood and looked away for a moment, and when I looked back she was gone without a sound. What a lovely teacher she was for the practice of sitting quietly, for letting go, and being amazed by life.
Photo: The pond sides are now covered with stones.
This morning, when I approached the pond, I heard a distinctive plop! And later, approaching again, I saw a tiny frog leap quickly from the beach rocks into the water. Another plop! It is our first frog. (Or maybe it is a toad–still not sure). No chance to catch it in a photo. But I am sure it was the best sound all day! And in more good news, most other pond projects are now complete.
The other day I used up the rest of the half-yard of stones I had gotten delivered early in the process–I added more to the planting ledge so that the plants were better anchored, and then I planned to use the rest of the stones in an upgraded overflow channel spill hole.
We had two inches of rain from tropical storm Elsa, and I was out there in my raincoat in the rain with a shovel, digging the spill hole bigger so muddy water wouldn’t flow back into the pond. Yesterday, I took a leaky five gallon bucket and drilled lots of holes all over it, so water would flow through it easily, but it could hold stones. Then I dug the spill hole deep enough to put the bucket down below the level of the spillway. I filled the bucket with small stones, and also put stones underneath and around the outside of it, finishing up with it today. Another rain is coming tomorrow so I will see if it works.
Photo: white plastic bucket, after drilling holes in the sides and bottom
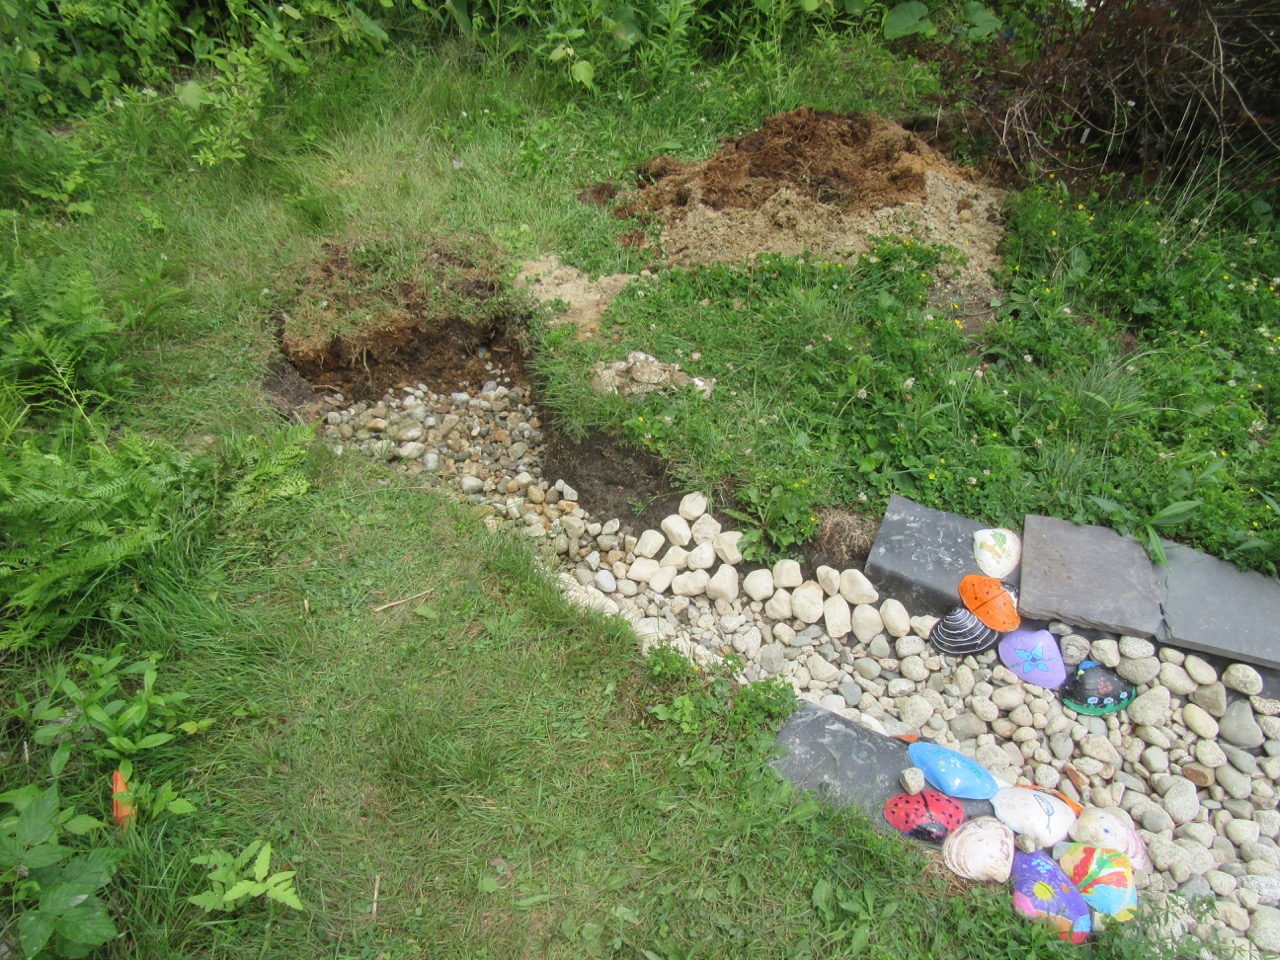
It is hard to show the slope, which goes down from the spillway on the right gently down to the hole on the left. The bucket is completely buried with more stones on top. I also repurposed some painted shells that had been made for me by the kids in my old church when I retired.
I have gone on many adventures looking for stones on the side of country roads, but I finally succumbed to the temptation to buy a few more bags of stones at the big box store. (I had tried that once before but the quality was terrible.) I needed more small stones to fill up the spill hole, and I needed larger ones for one small section of pond siding under the little deck. The small ones enabled me to complete the spill hole. The larger ones were a weird cream color, that left a creamy residue when washed. I don’t know what they do to them. But I put them in place, along with a few bricks, under the little deck, and now it is complete.
Since my last posting, I was also delighted to receive some blue flag iris from our friend Lisa Fernandes, who gleaned it from her pond. They are already growing new shoots! You can see them in the upper photo, the largest plants on the other side of the pond. I also transplanted my little pond lily tubers into a larger basket filled with stones, and placed them on the lower shelf.
It is so lovely to sit by the side of the pond and watch the reflections on the water… may you have such loveliness in your life.
Yesterday, I installed a little deck on the edge of the pond! This idea was an evolving process–at first I was going to put a large slate stone at the spot on the surface that leads into the steps inside the pond. But working on the pond during the last several weeks, I discovered that slate gets really, really hot in the sun. So then I was trying to come up with something that could serve as a top step that wouldn’t get hot.
Happily, I found an upcycling solution! In our garage, there were six wooden decking boards from the previous owners that were stored on rafters above the cars. They were very heavy, about six feet long, and some of them were attached to each other, but I was able to get two of them down. The boards were painted brown, and they too got very hot in the sun. But then I found some older paint cans in the basement. I did a prime coat of white on one day, and then a coat of light gray concrete paint, which has some waterproof qualities, two days later. Yesterday, I drilled holes and screwed them together with small boards I had also painted.
Everything was a bit off level–the boards, the ground–so I installed them using small stones underneath to stabilize things. Voila! We now have a top step, which is also a little deck where we can sit on the very edge of the pond, with our feet in the water. And after positioning a few more stones, and slate rocks, I can now say that the surface level of the pond is virtually complete. I still need to find some more five inch stones to line the rest of the vertical sides under that area, but if you look at it from this side, you can’t see any liner showing.
The tiny plants are starting to grow a bit, the pond lily rhizome that I positioned on a lower level sent up a tiny leaf all the way to the surface. I’ve topped up the water level with water from the rain barrel once. I plan to add more small stones to the planting ledge to give plants more to hang onto. This morning it looked like someone had messed around with the pickerel rush plants. I still have to finish the overflow channel. It will all continue to grow and develop as the summer goes on… hopefully the plants will start to take over half the surface of the water. But what a happy moment today!
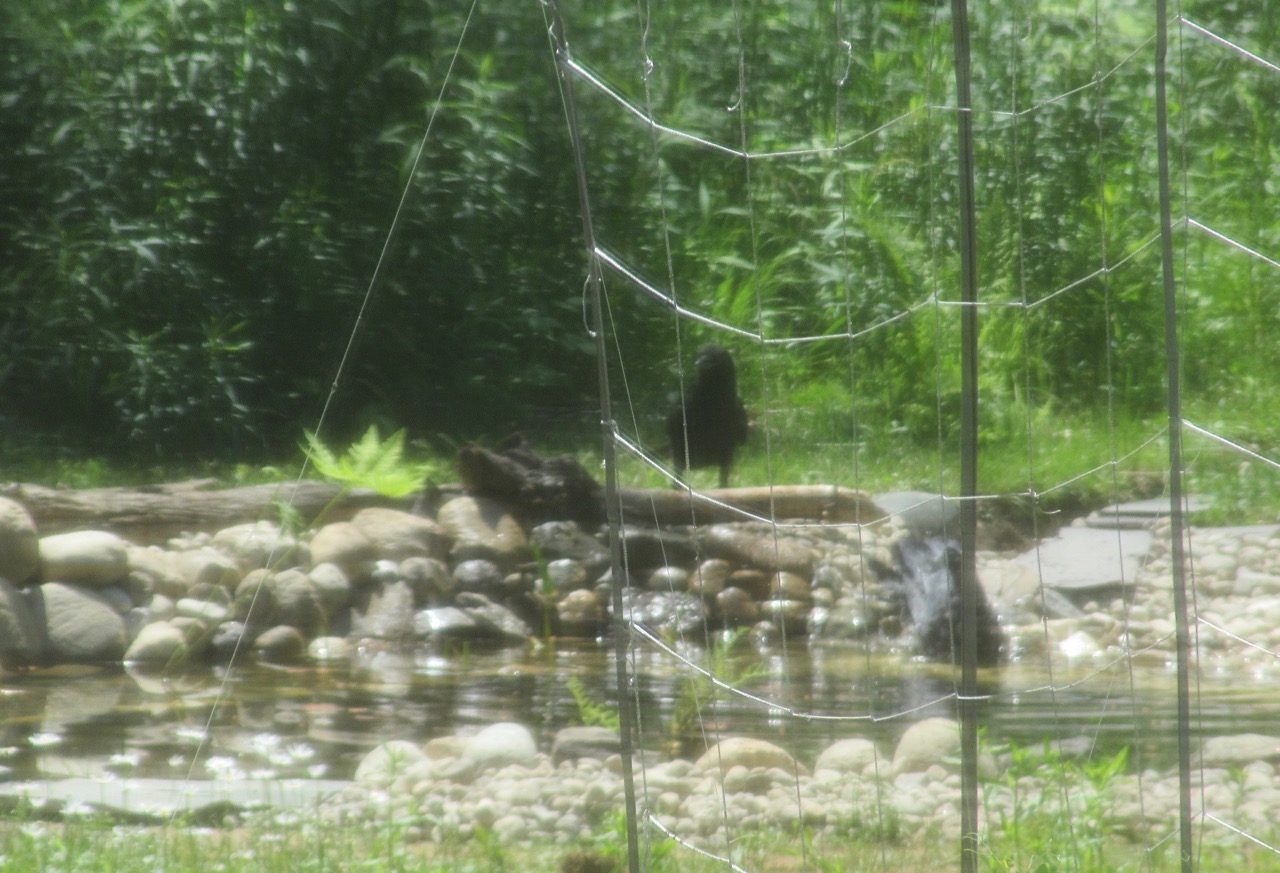
Photo: one crow perched, another below to his right, dipping her head in the water, tail up
Yesterday, I was excited to see a few crows visiting the pond! I was looking out my window from the house, and there is a string-and-bamboo trellis (for our snap peas) about halfway between the house and the pond that partly blocks the view. But if you look carefully, you can see one crow taking a bath, while the other is perched on a log on the edge behind it.
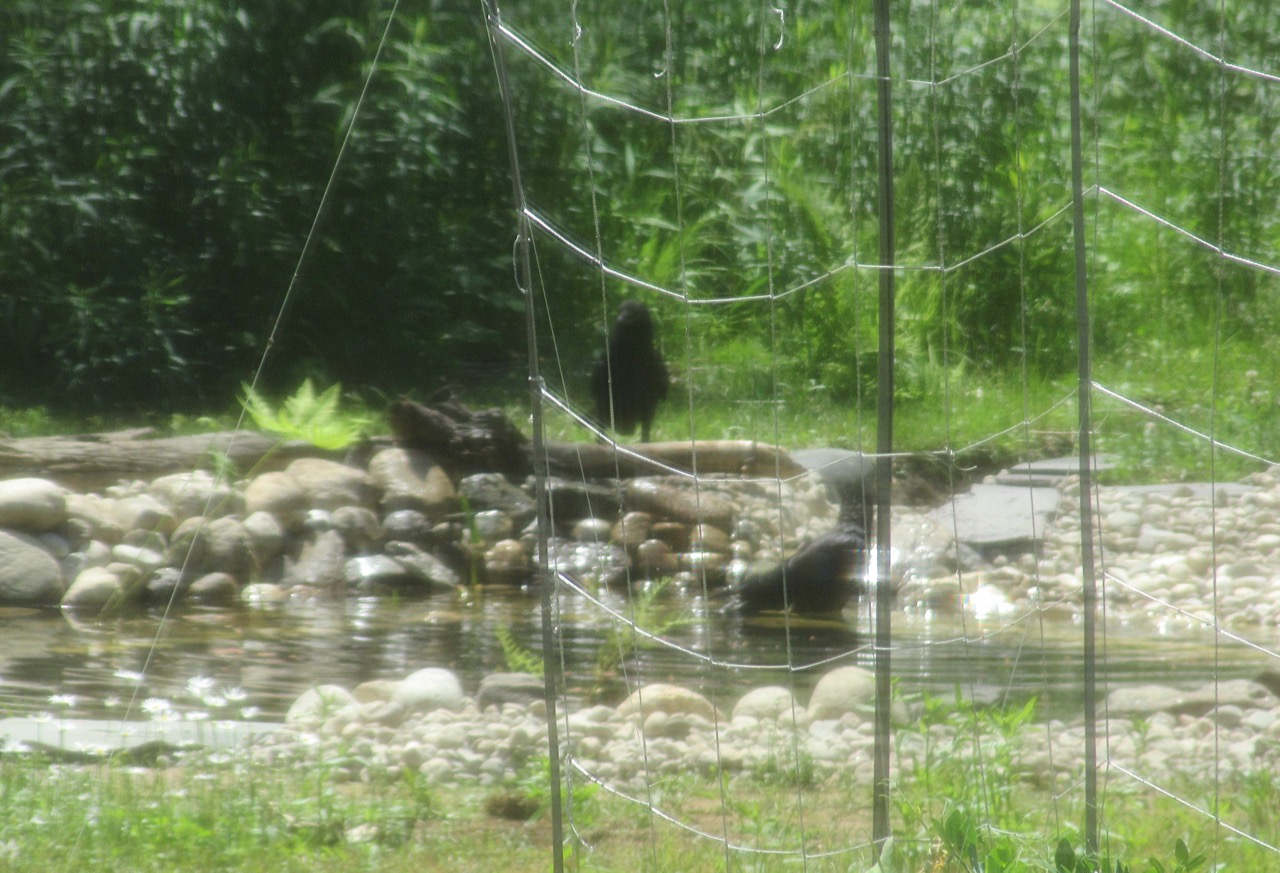
Photo: Crow in the water lifts up its head
I have been slowly gathering more stones from country roads, and adding them to cover the pond liner all around the edge, along with placing some aging branches there, from around our land. Seeing the crows perched on the branches, I am so glad I included them. This process of covering the liner edge is about two thirds complete now, and the plants in the water are also beginning to grow some new leaves and shoots.
Photo: crows on the branch, one with a stone in his beak, one wet from her bath
I didn’t notice until I saw these photos, but one crow has picked up a little stone in his beak! He reminds me of me as I go around looking for stones the right size for the edge. I wonder if he brought it with him to place somewhere himself. (By the way, I don’t know whether these crows are male or female, but they are not “its” so I prefer to give them personal pronouns. I wish English was like the Wabanaki languages in that the personal pronouns are not gender specific.) After placing a new batch of stones in the morning, I felt really exhausted and rested for the afternoon. But in the evening, I came out and just sat down next to the pond, enjoying the reflections in the water.
I am slowly adding stones and plants and developing the top edge of the pond, to cover up all the liner. I did a minor adjustment to the overflow channel to lower the water level by about an inch, and added some soil (underneath the liner and layers) to an edge that was a little bit lower than other parts. I’ve been using my pile of small stones for the edges, but stabilizing them behind larger stones. I decided to use the larger stones to also cover the vertical slope between the planting ledge and the top. This was in the original plan, but I didn’t think I would have enough stones to do it. And I don’t. The other day, Margy and I went to another rural road and brought home another batch of larger stones from the side of the road. But it doesn’t take long to use them up.
By the way, in the background, from left to right, you can see a ninebark shrub in bloom, a summer sweet shrub, and a little elderberry that’s barely visible. I am trying to start some hazelnut bushes from off shoots of our big ones. Also, there is a lot of goldenrod that will flower later in the season, and on the far right back, our mulberry tree–which after a couple rough starts is finally doing better this year.
Back to the stones for the pond, even though I don’t have enough of the larger stones, it seemed smart to do as complete a finish as possible, section by section. Here is a close up of the most completed section, behind the cardinal flower, where I also incorporated an old piece of a branch. I am enjoying this design process.
Photo: pond detail with stones and log
I also ordered and received some more plants–this time I got some pickerel rush (or pickerel weed), Pontederia cordata. This native plant will grow 2-4 feet tall and have blue flowers. I ordered five, but received eight little root and stem starts. So then I decided to rearrange the arrowhead plants, moving them closer to the “front” from where the photo is taken, and where we’ll sit to watch the pond. I planted the pickerel rush mostly where the arrowhead had been, on the back left, and then put a couple of the smallest ones in front of that log. Here is what it looks like right now, and this is the largest one. It takes faith and imagination to see them growing and flowering in the summer and fall.
Photo: Pickerel Rush held in place in the water by stones
In other news, I have twice seen (from my window) a crow walk up to the pond and get a drink of water. Tonight I also saw a few little water bugs of some kind swimming around. Animal life is starting to arrive. The other day, when it was so hot, there was some green algae in the water, which is to be expected until the plants grow bigger–but then it disappeared again today. Time to think of another place to find some more of the larger stones. It all feels magical.
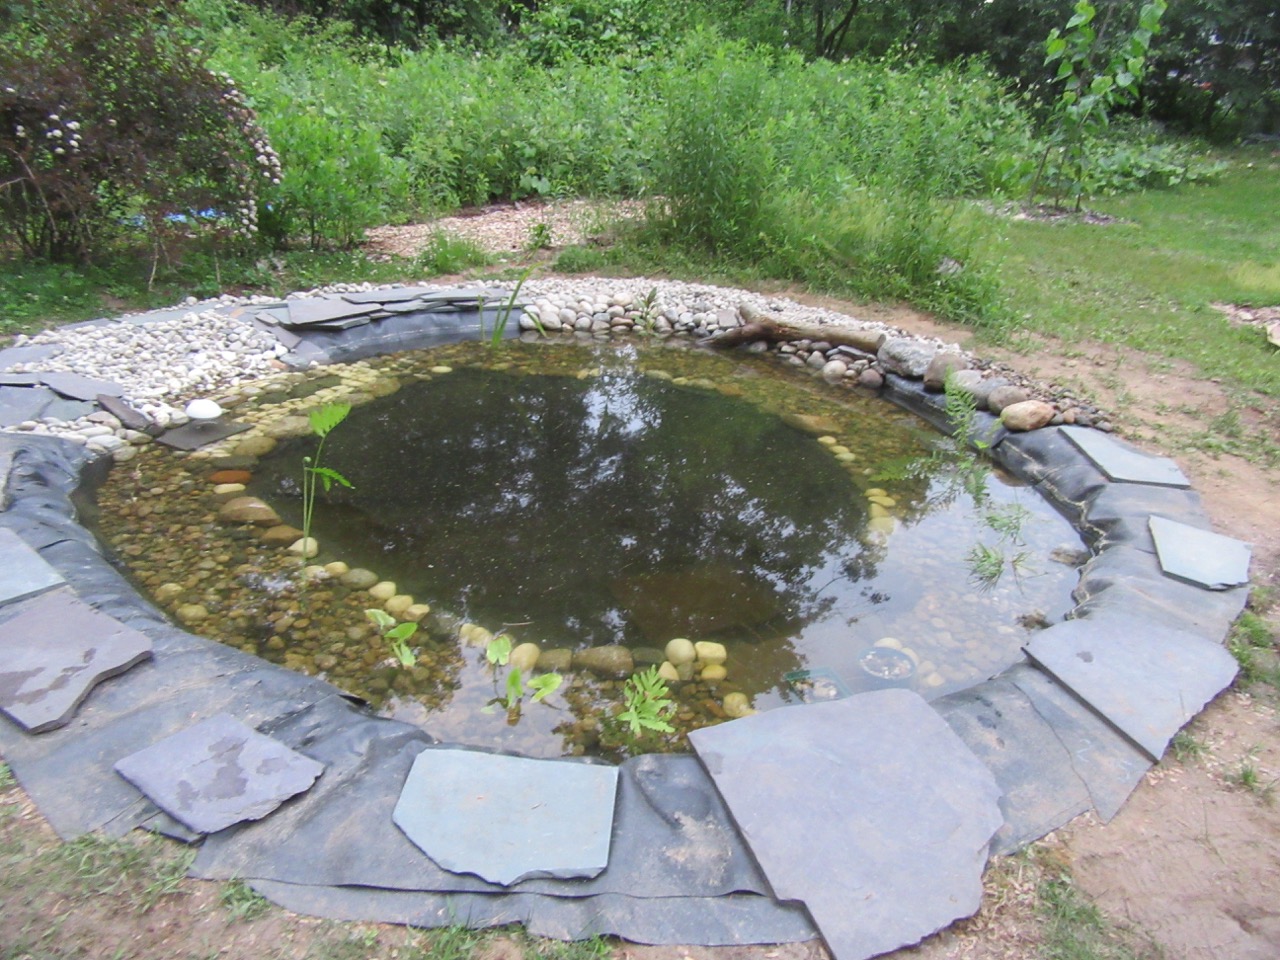
Photo: Adding water again, stones in planting ledge done. Isn’t it beautiful to see the reflection of the trees in the water?
This morning and this evening I finished adding stones to the planting ledge of our pond. And this evening, I began the second half of filling the pond, using water from our rain barrels! While I watched the water flow in, I used a pond skimmer to try to clear some of the debris that has fallen in–maple seeds, pollen, pine needles. I hope tomorrow I can finish filling it, and start to put in plants. Some plants have already arrived, I have them waiting in a bucket of water.
It was a really hot day today for Maine (88 degrees), and earlier in the morning, I mostly watered my vegetables and tended the fruit trees. I have spent so much energy on the pond, and I didn’t want to neglect the other parts of the garden. I checked on the cherry trees, thinned tiny peaches from the peach tree, and did a kaolin clay spray on both. Yesterday I had cut off some leaves on the cherry that were infected by black cherry aphids. I left a few, especially if I saw ladybugs near them. Ladybugs lay eggs, and when their larvae hatch, they eat the aphids. In this photo, the curled leaves have the aphids hiding inside. But see how bright the ladybug eggs are!
Photo: bright orange ladybug eggs
The next two days are predicted to hit 90–so there will only be a few hours in the morning and evening that I can bear to be outside. That seems to be our new rhythm here. Planting will be so much fun–updates later!
Photo: A bulk order of small round stones of many sizes
This week has been a big adventure in stones. In my last post about my pond project, I mentioned that I needed to get a pickup truck, to go to a store that had “2 inch round stones” in bulk. Well, I did some research, and put on my big girl pants, and rented a pickup truck from Home Depot. I drove to Estabrooks, where a clerk rang me up for a half cubic yard of the stones. But then they were informed by the people in bulk orders that they didn’t carry 2 inch round stones. Despite a clerk reassuring me two days earlier that they had them. So a manager came by, and explained that the previous clerk was wrong, they didn’t carry them any more, and had no way to order that amount from a possible supplier. She was very apologetic about the mistake, and gave me a $40 gift card to compensate me for the truck rental.
So truthfully, I was proud of myself for doing something I hadn’t done before–renting the truck–and they did treat me well and took responsibility for their mistake. But I was disappointed, and back to square one for finding stones. I started looking again at the notes I had made before, and noticed that I had written down another possible source for stones–but the information online wasn’t very complete. (I think people who sell stones in bulk don’t really like to work on websites.) So I called New England Specialty Stones, left a message and got a call back a few hours later. They were happy to deliver a half yard of 1 1/2 inch round stones to my house, with a delivery charge, and the total price was $76 dollars–less than what it would cost for my earlier Estabrooks adventure. The stones arrived on Thursday, and were expertly dumped on the tarp I had placed on our patio. I felt such relief and joy to see those stones.
Some parts of the pond project have been step-by-step, like digging a hole. But other parts have required a big push on my part, with some help from others–like laying the pond liner, or getting a bulk order of stones. Now that the stones have been delivered, I am back to the step-by-step processes. The person I spoke with about these stones mentioned that they’d need to be washed, to use them for a pond. So I started doing that today.
Photo: Stone rinse #1 of 5
It took five rinses before the water was relatively clear. But I did have the idea to dump out the “dirty” water onto the beds around my fruit and nut trees. I am thinking that this stone dust is likely a very good soil amendment–like the granite dust I put around the tree beds earlier on. Once rinsed, the stones are actually quite pretty and colorful, with a great variety of sizes and shapes.
Photo: rinsed stones
Once rinsed, I take them via the wheelbarrow back to the pond area to use. Load by load. First of all I rebuilt the stone “beach” that is an incline for critters to be able to access the water, to get in and out easily. I mentioned before that after my first attempt I was worried it was too steep. So I removed those stones, lifted up the liner and underliner, and dug it out deeper–I took away a whole wheelbarrow full of soil to make a longer gentler incline. Then I positioned larger stones at the bottom inner edge, and also at the lower outer edge, to be a stronger support for the stones on the incline. Now, it feels sturdy and very usable. Once the pond is filled, the water will reach about halfway up that incline.
Photo: Rebuilt stone “beach” for critter access
The beach completed, I started bringing back stones to put on the planting ledge. I positioned a few of the larger stones I had previously found into spots along the inner edge of the ledge, and then shoveled lots of the small stones behind them. Well, I did this wheelbarrow by wheelbarrow, after five rinses of the stones each time. I think I did about 5 or 6 wheelbarrows this evening. I have seen some beautiful ponds on the Building Natural Ponds Facebook group–with large rocks covering every part of the pond liner. I don’t think that will be my pond. I don’t have access to that kind of rock. My goal is to cover the planting ledge with these small stones, and then finish filling the pond. Then I will start putting plants there, and eventually, they’ll hide the pond liner going up the side from the ledge to the top. But that might take a while. Once I’ve put plants in, I’ll use whatever stones I have left to cover the liner at ground level. Or come up with another idea. But I am excited that critters will have access, and I am happy to be back in a step-by-step process.
The other day, I was talking to a group of friends, and articulated why this work is so important to me. With all of the pain of our world, the injustices past and present, the dangers of environmental degradation and climate change, why do I work in the garden, why do I make a pond? For me, to make relationship with this little piece of land, to love and care for this land, is a spiritual practice. I am only one small person, but I hope by learning to love this small piece of land I can make a prayer, make magic, for humankind to learn to love the earth. I pray that we can stop exploiting the earth and find a different sort of relationship to the earth. A relationship built on respect and mutuality and humility. A relationship in which we understand the sacredness of the earth. A relationship of gratitude, for water, for soil, for stones, for plants. That is the magic that lives in each stone.
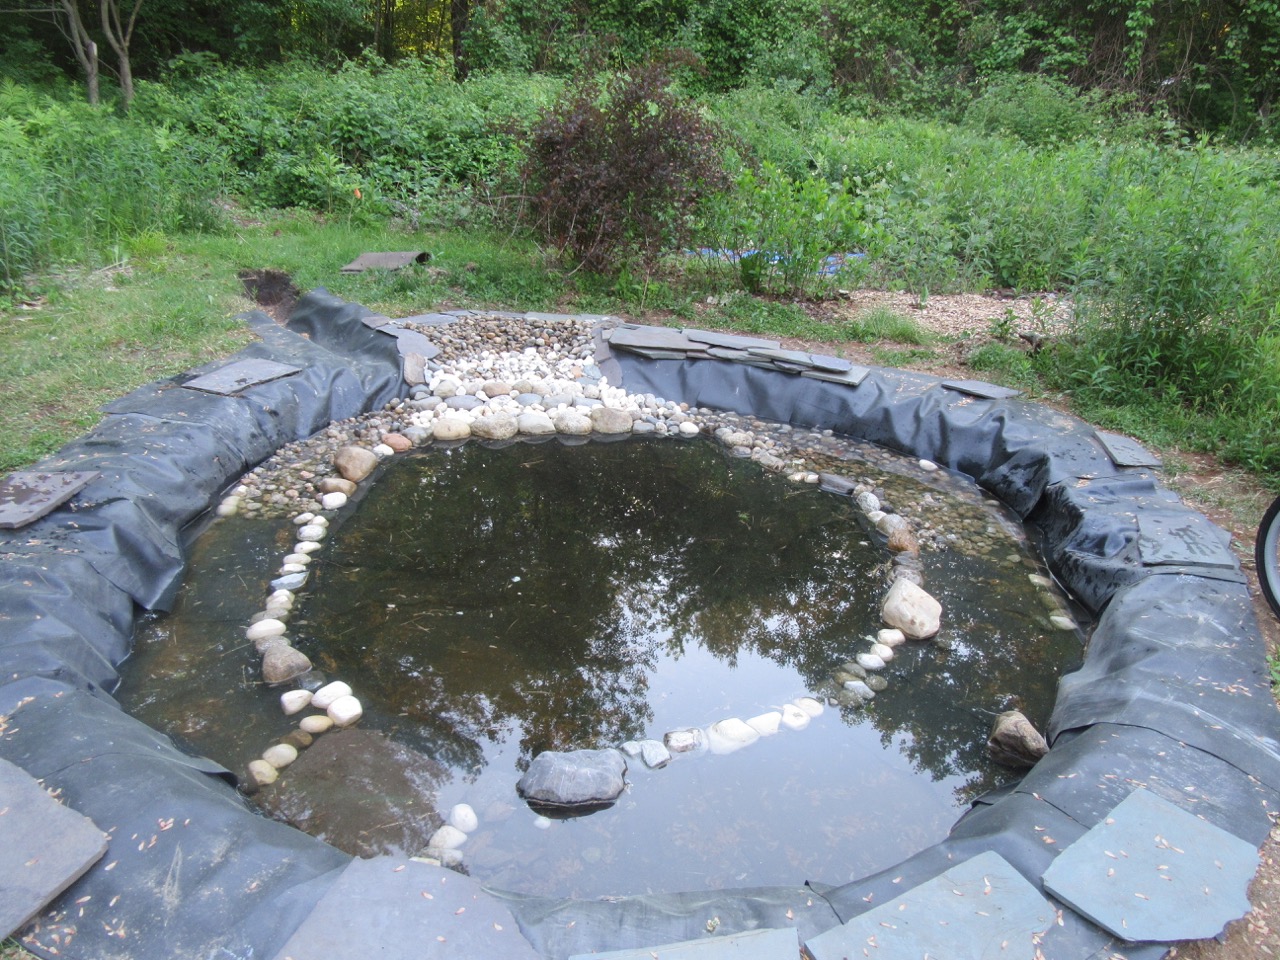
Photo: Pond tonight, after putting some stones on the planting ledges
Finding stones for the pond project is proving to be an adventure. It is raining here today, and was yesterday too. The days before that I was able to place all the stones I had previously gathered onto the pond planting ledge. I also bought some white stones in small bags–they were supposed to be 3 to 5 inch stones, but at least half were much smaller than that. Maybe not such a great buy. But I had enough to finish a ring around the center of the planting ledge. These stones will be large enough to stabilize smaller stones behind them. Once the pond is filled, all of them will be below the water.
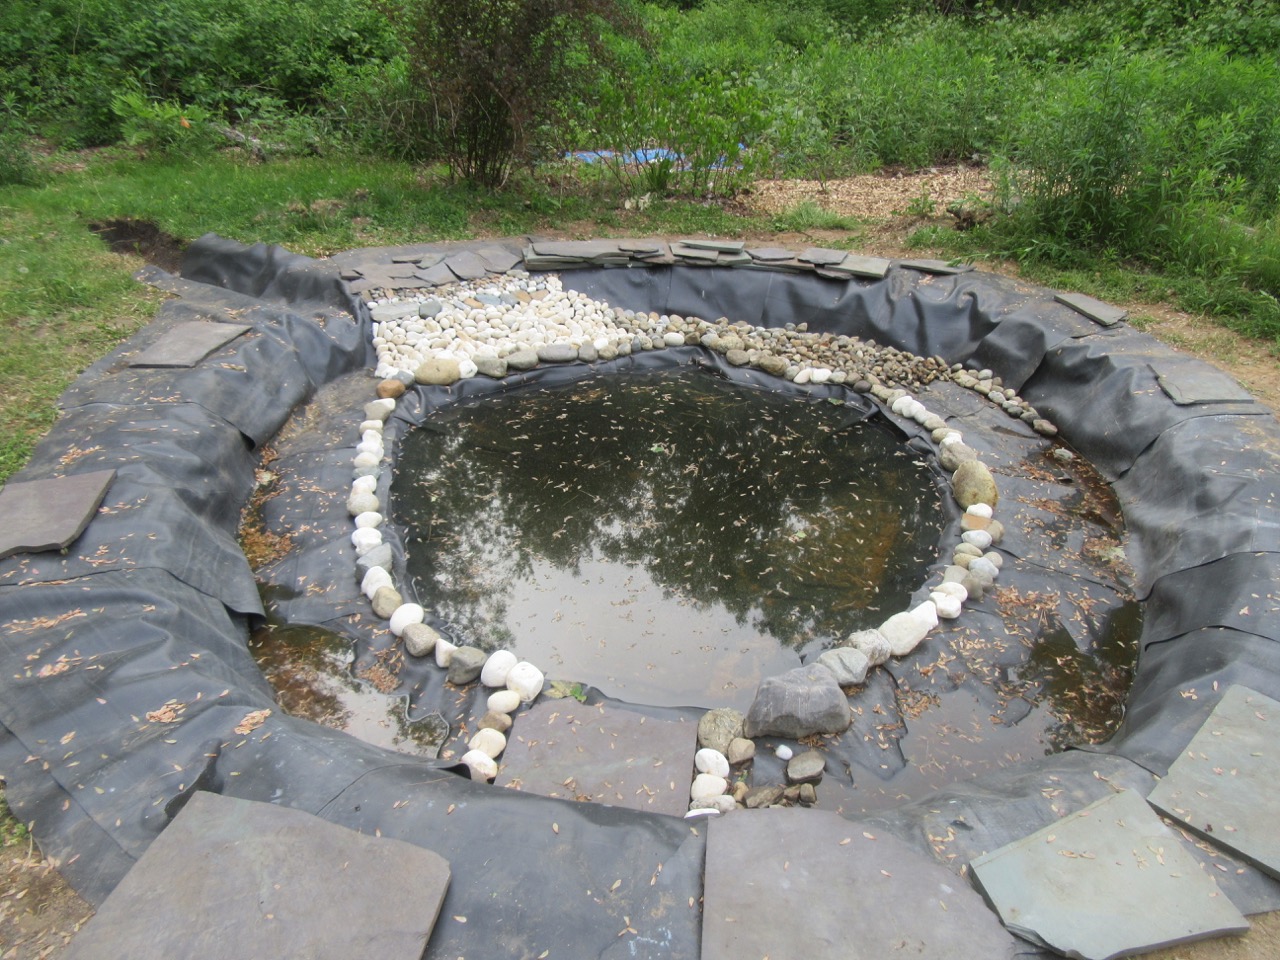
Pond with stones in a ring around the ledge, plus “beach.”
I worked on the “beach,” which is an incline for critters to be able to reach the water easily. I did it early in the process because It seemed like this might be the trickiest part, and I wasn’t wrong. In the photo it is at the back, with mostly white stones. I had gently placed each stone one by one. However, I am thinking I might need to redo the upper part of it because when I imagine little critters walking on those stones, it seems like they are not stable enough–the incline being slightly too steep. But to redo it, I’ll have to move the upper stones, and go beneath the liner and the carpet, and take out a bit more soil so the slope is more gradual. When the pond is filled, the water will cover the white stones and come to the level of the row of larger stones behind them.
Close up of pond “beach”
After I finished the (imperfect) beach, I put all of my smaller stones on the ledge to the right of the beach. As you can see in the first photo, they didn’t cover very much. So I will have to buy more small stones for the planting shelves, but I am now looking at 1-2 inch round stones, not “pea stones”. I discovered that a nearby nursery has such stones available in bulk–but that means either borrowing or renting a pickup truck to be able to collect them. I can get a half-yard of them for a good price, which should do it. It is just a big project to rent a truck, get stones, unload them at my house, and return the truck. I don’t mean to complain! If anyone locally (Portland Maine) has a pickup truck (with an open bed) who is willing to loan it, can you let me know? For some reason, this part feels challenging to me.
So, in the meantime, last night I suddenly had an idea of where I could find some more bigger stones. In our old neighborhood there were rural roads with no houses nearby, and I thought I remembered seeing stones on the side of those roads. Today before the rain came, I drove over there with two intentions. Get some stones, but also, look to see if the lady slipper plants we use to find in the woods there were still blooming. And they were. And I did get some good stones by the side of the road! I have a feeling this gathering of stones will continue for some time.
Sometimes the mental work is as hard as the physical work of building the pond. If you’ve been following along with this project, you know that after digging the hole, after putting down old carpet to protect against invasive bittersweet roots, after placing the underlayment and then the pond liner, we started filling the pond with water a few days ago. That felt so great! But then I felt stuck. The Building Natural Ponds book, by Robert Pavlis, which has been such a great guide to this whole project, suggested using old carpet as an “overlayment” on the planting shelves, to protect against the stones that were to go there. But I had run out of most of the carpet, and also had misgivings about putting old carpet into the actual water of the pond. So what to do?
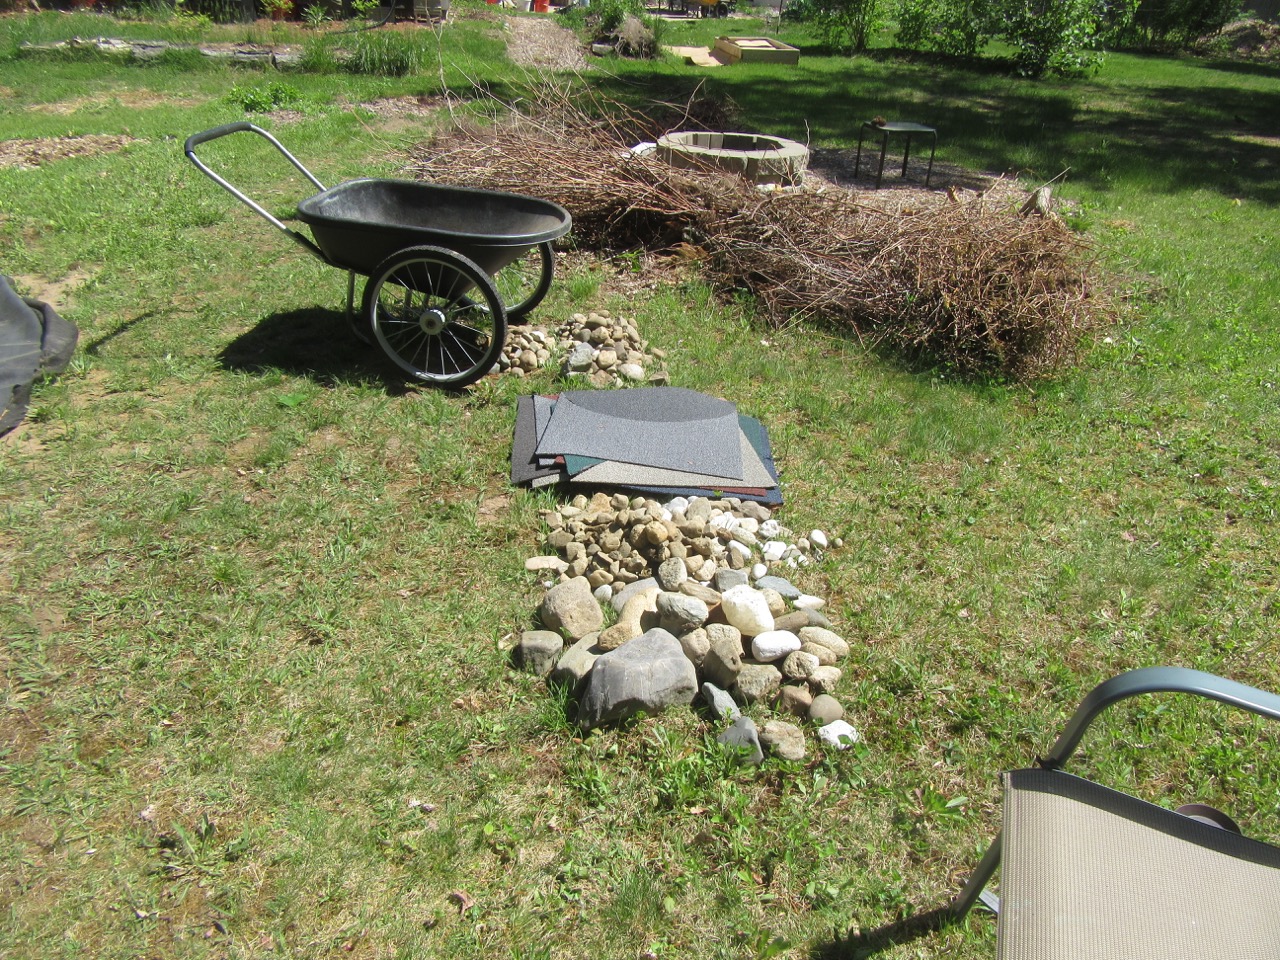
I thought and thought and then posed the question in two Facebook groups–the Building Natural Ponds group and the Northeast Permaculture Network. Then, I went outside and started gathering all the stones I’d been saving for the last five years from around the yard. I had some in five gallon buckets, and some in a pile next to the garage where violets had decided it was the perfect place to bloom. I had to dig under the roots to get all of those stones. But violets are very prolific in our yard, so I wasn’t worried about them. I also brought back the final bits of carpet I had–2 by 2 squares made of eco-friendly nylon.
Photo: Gathering all the stones to use in the pond.
Once that was done, I came back inside and checked my Facebook posts. I had gotten a variety of answers and suggestions from folks, and finally came up with my answer. I would use extra pond liner as an overlayment. Robert Pavlis had thought that idea would work well, so that gave me the confidence to do it. Some folks didn’t bother with any overlayment, but it gives just that added layer of protection against cuts or punctures from stones or little animal claws. So I went back outside, and I bravely made the first snips to cut off the extra pond liner around the edges of the pond. Because the pond wasn’t quite as deep as originally planned, there was quite a bit of extra liner.
Photo: extra pond liner
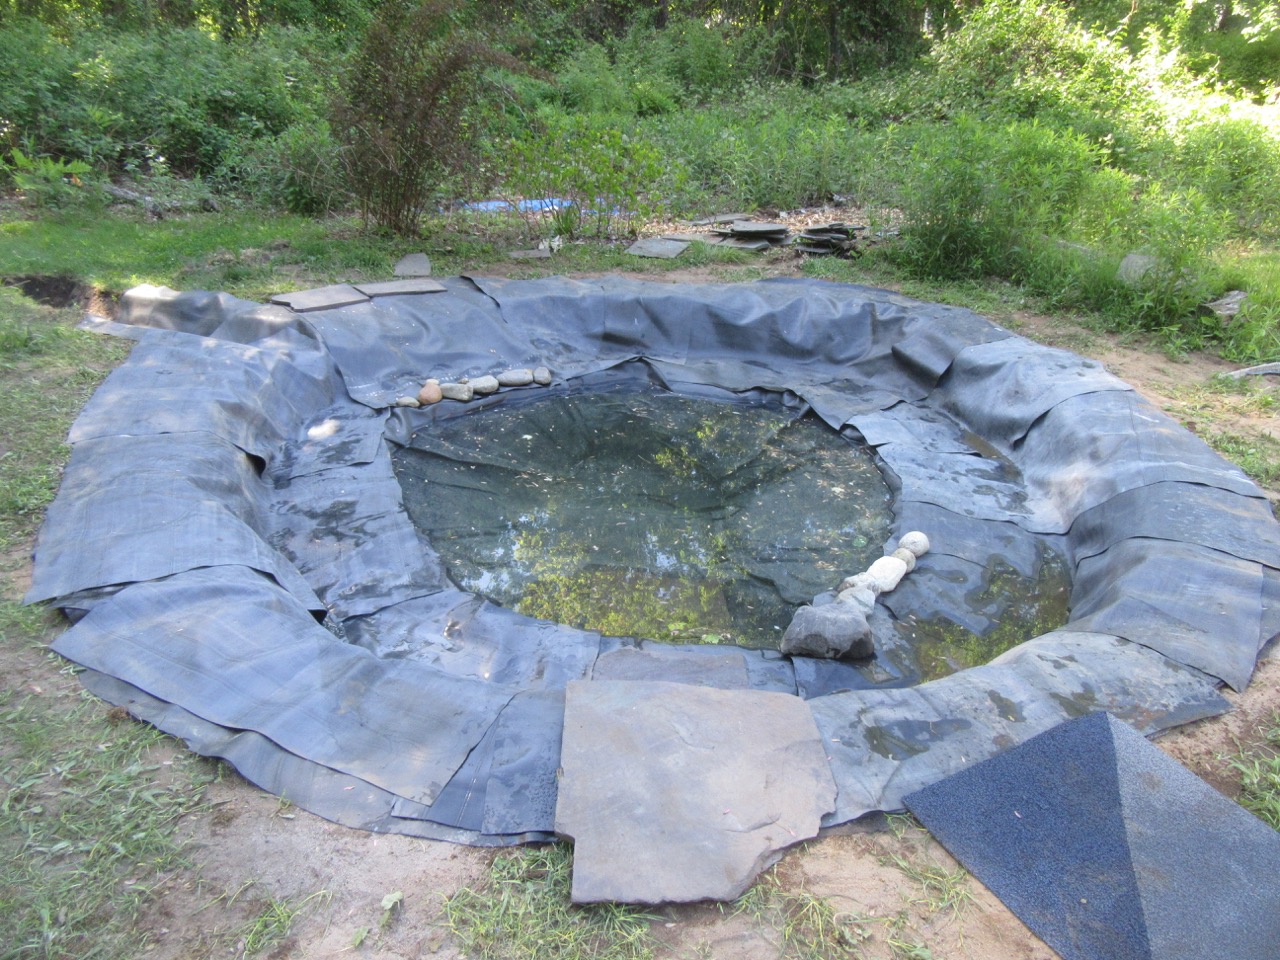
I started cutting it up and laying pieces of it all around the planting ledge, starting with the spot that I hope will be a little incline “beach” for animals to be able to approach. And as it happened, I had just enough liner to cover everything I needed. Then I started putting some stones into place. I did that in bare feet, and an old carpet square worked as a place to wipe off my feet before getting onto the planting ledge. We had some slate pieces that we found here when we first moved here, so I am hoping to use them around the edges of at least part of the circle. But I am also trying out using them for steps into the pond. Once the pond is full of life, it will be slippery, so maybe not. Decisions for later.
Photo: pond with liner overlay done, and stones begun to be placed.
I worked into the late afternoon, but finally came inside for another commitment. Today I am feeling all that work in my body–sore hands, sore muscles. I am eager to continue laying the stones I have–and then I will see how many more I will need. More decisions. The basic idea is to put larger stones around the center of the planting ledge, and larger stones near the outer ring of the planting ledge, then pea stones to fill in–those will be the growing medium for bacteria that clean and filter the water and aquatic plants that clean and filter the water. But as with this whole process, I am taking it step by step. I think if I had really known how much work it would be, I might not have had the temerity to begin. But here I am.
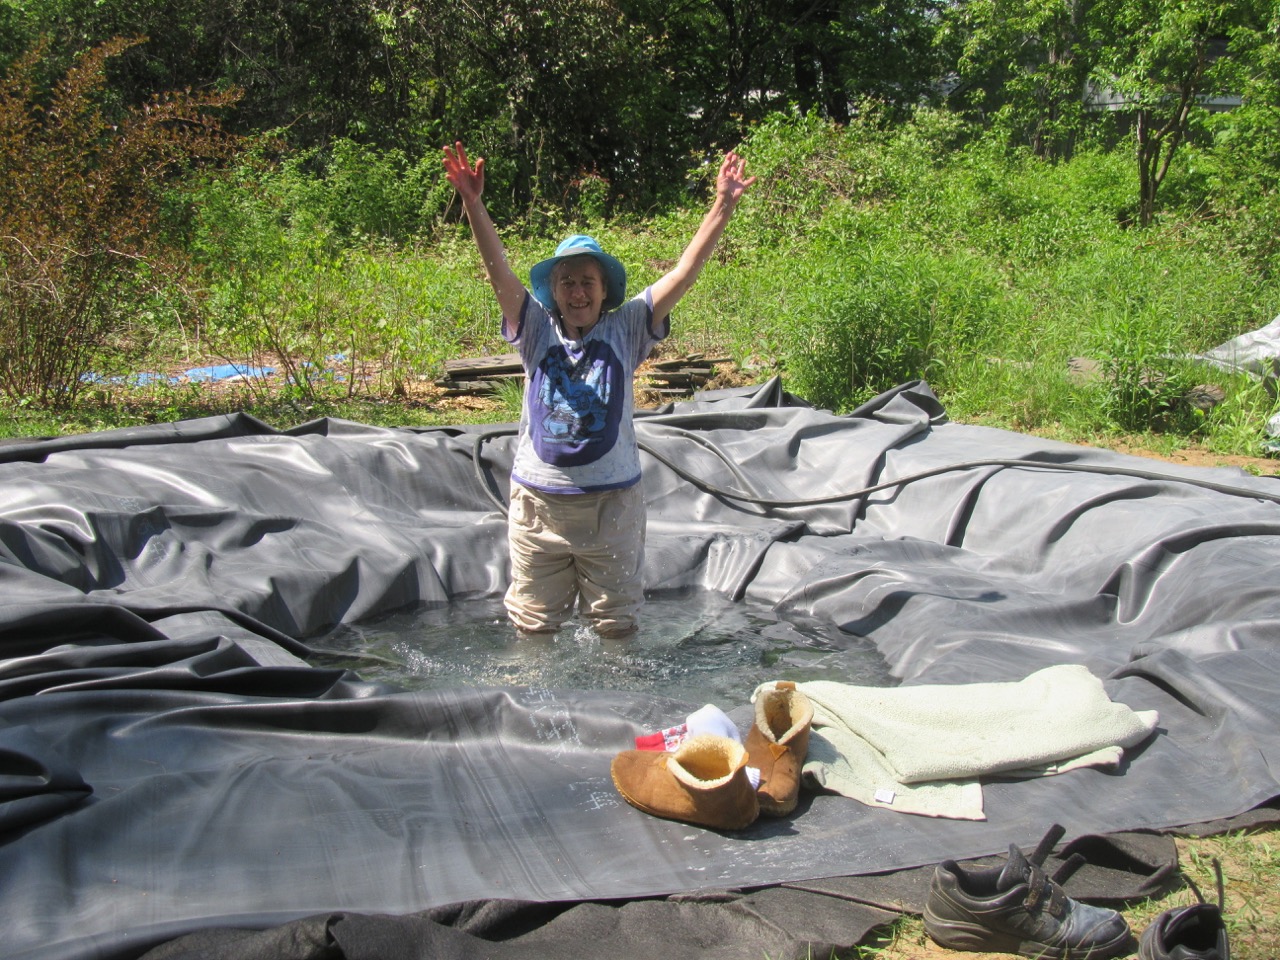
Photo by Margy Dowzer: I am in the water as we fill the pond!
Such an exciting moment when we began to put water in the pond yesterday! It was a sunny hot day, so being in the cold water was great. I found I had to get right into it to do the folds of the pond liner which are necessary when you take a square liner and put it into a round hole. We filled it up to just under the level of the planting shelf.
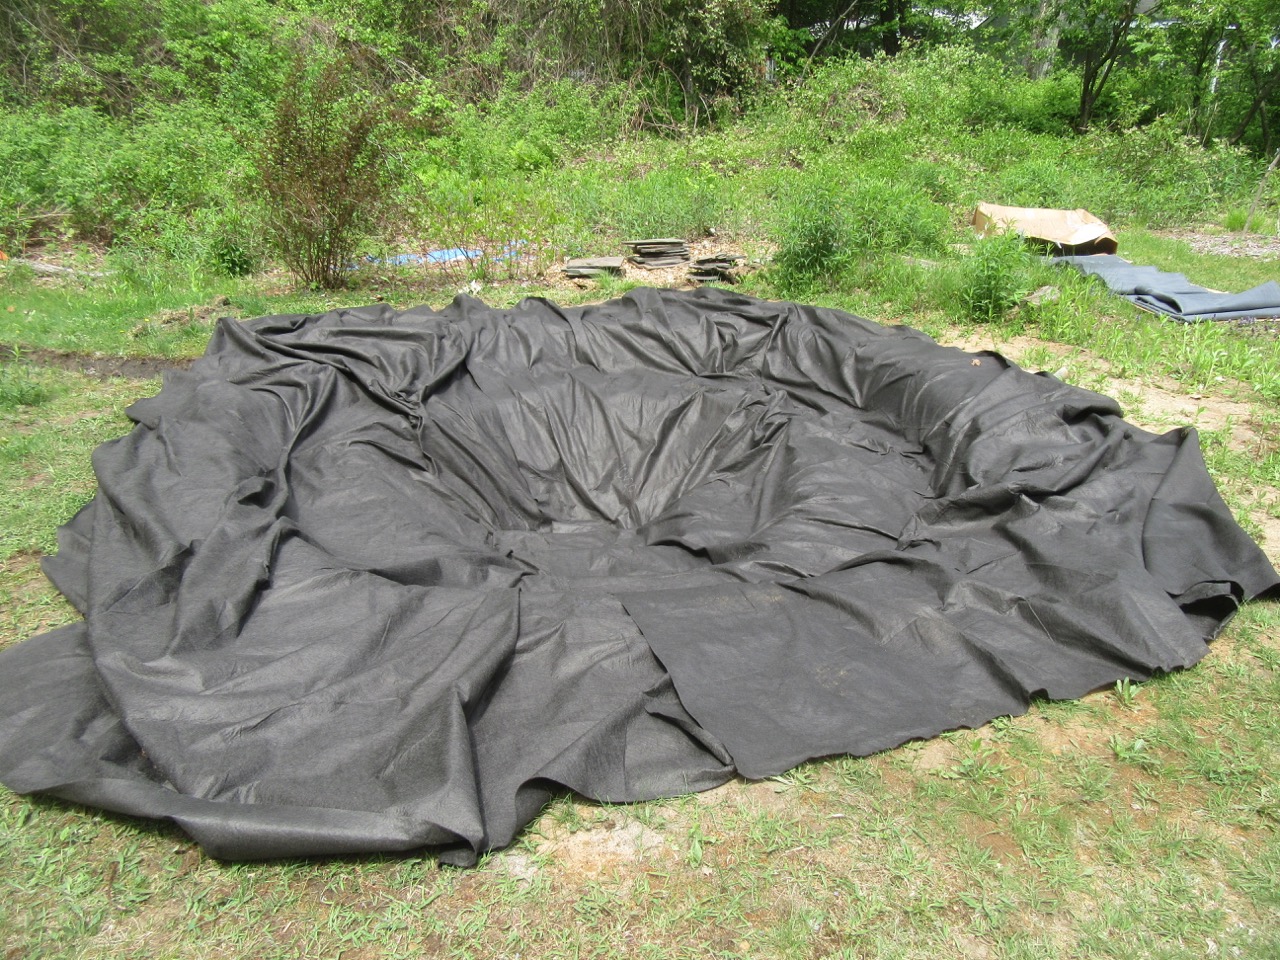
Photo: black cloth underlayment
But back to the earlier parts of the process–the first thing I did yesterday was install the pond liner underlayment–a very light felty fabric thing that protects the pond liner. We might not have needed it, because of the carpet strips, but the pond liner is guaranteed for life if you use the underlayment. I had purchased a 20 by 20 foot 45 mil EPDM liner, and the underlayment came in two pieces of 10 by 20. I overlapped them about 3 feet. After that, I also dug further and deeper on the overflow channel, and made sure it sloped away from the pond. You can see it in the left on the photo.
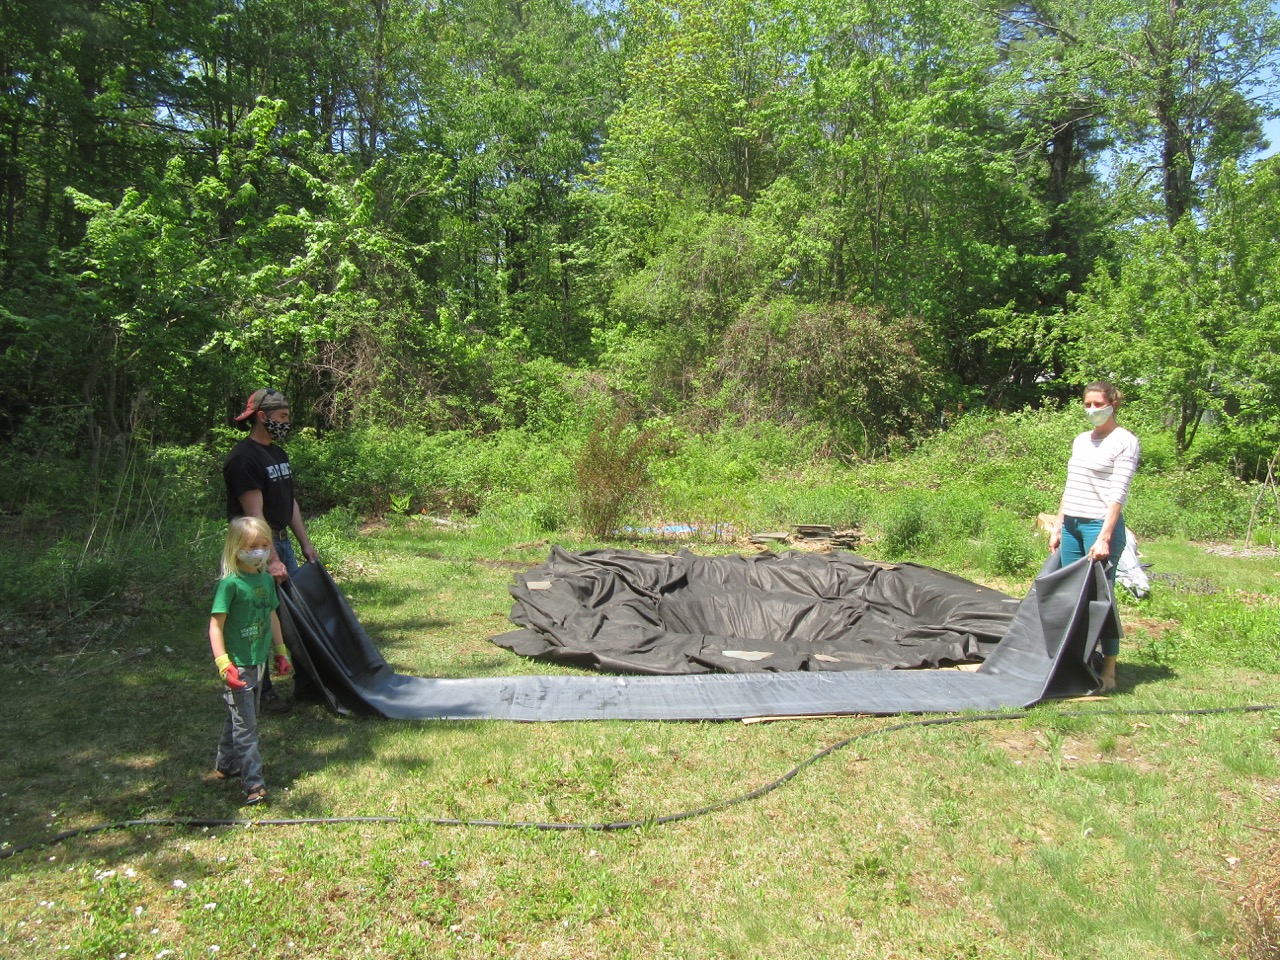
Then, midday, our neighbors came by to help with installing the pond liner itself–the liner is very heavy, but with the three of us (plus a kid!), it wasn’t hard to position it over the hole. So grateful for helping hands! Because the pond wasn’t quite as deep as planned, I knew we’d have extra liner on the sides, so we didn’t have to worry about getting everything exactly centered.
Photo: getting in position to install the liner.
As it turns out, black rubber gets very hot in the sun, so we all wore gloves, along with our masks for COVID.
After the liner was roughly in place, the neighbors went home. I got into the hole and adjusted everything so it was flush with all the surfaces underneath, creating folds where needed. It was recommended by my Building Natural Ponds book to not step on it with shoes, but socks weren’t enough to protect my feet from the heat–so I pulled out my fuzzy slippers and a blanket.
Photo by Margy Dowzer: Taking a moment to rest while shaping the liner to the hole.
After a short break, we started filling the pond with our garden hose. Water from the house has chlorine in it, but the chlorine will evaporate quickly and so this water is fine to use especially before we have any life in the pond. Eventually, we’ll use water from the rain barrels you can see in the back of the photo, but we’ve had no significant rain for a while. While the hose was running, Margy and I wandered around the back of the yard looking at plants, and then finally pulled up chairs to watch the water fill. And I got in a few times to keep adjusting the liner–glad to have an excuse!
It isn’t the end of the process by any means. I have been doing this step by step, not knowing how long each step would take. The next thing to do, and why we only filled up to the planting shelf, is to cover the planting shelf with stones and pebbles. I’ve collected lots of rocks from around the yard, but will definitely need to purchase more. And that is a bit more complicated than I realized, likely involving borrowing or renting a pickup truck. But in the meantime, I went online and ordered 5 native pond plants that will arrive in about 10 days. It is really happening! And there is water in the pond!