Hugelkultur 5 & Peach Blossoms

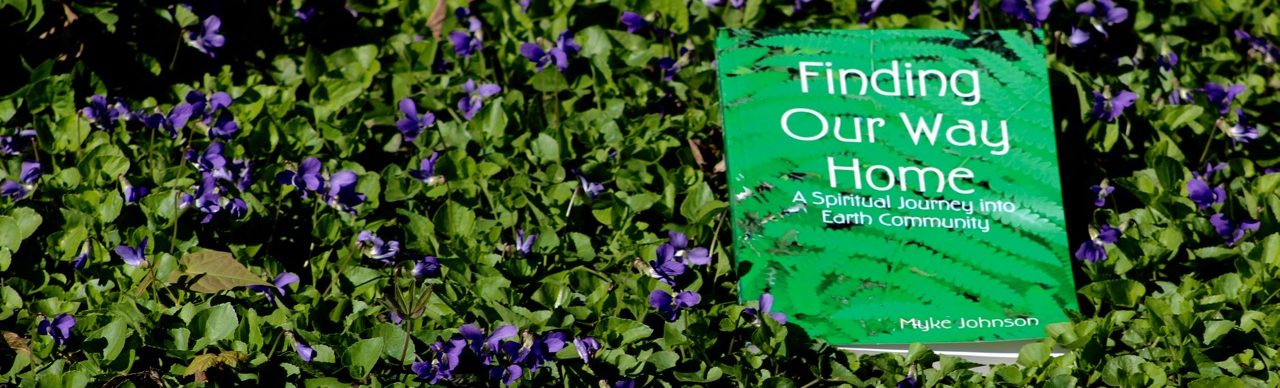
Wow, it has been a month since Hugelkultur 4 when I last devoted a post to progress on our hugelkultur garden bed. I am happy to say that yesterday I planted the first seeds! It has been a slow process of adding more soil and compost, a little bit each day, plus another layer of seaweed to help keep some of it in place. I also added soil and compost to the area between the mound and the logs marking the path, so there is a lower level on that side as well as a higher level. That in turn provided support for something like a slope of soil on that side. We planted lettuce and broccoli and spinach in that lower area, which will get a little more shade than other parts of the mound. It is a bit late in the season for all of those, so we’ll have to see how they do.

Hugelkultur done for now

I finally decided that it wasn’t really possible to get enough soil to stick to the other side to use that as a planting surface, at least for this year. I’m calling it done for now! But as the mound ages and settles year to year, I think it will continue to evolve and we can keep shaping it and adding to it. For now, I intend to plant zucchini and bush beans and maybe some cucumber and kale on the top of the mound, and the zucchini and cukes can cascade down the sides. Our last average frost date in Portland is May 24, so those will get planted soon.

Hugelkultur May

Meanwhile, speaking of frost, we had three freeze-warning nights this past week, and we covered our blooming peach tree with a tarp each night. But yesterday, I witnessed the best thing ever. I was sitting in my chair and saw a flash of something out the window, so I looked up. There was a tiny hummingbird, the first of the season, visiting each of the peach blossoms looking for nectar. I can’t explain why it moved me so.  All of the care given to the tree, all of the natural beauty of the tiny hummer. No way to capture it in a photo, but here is the peach tree in bloom.

Peach tree in bloom

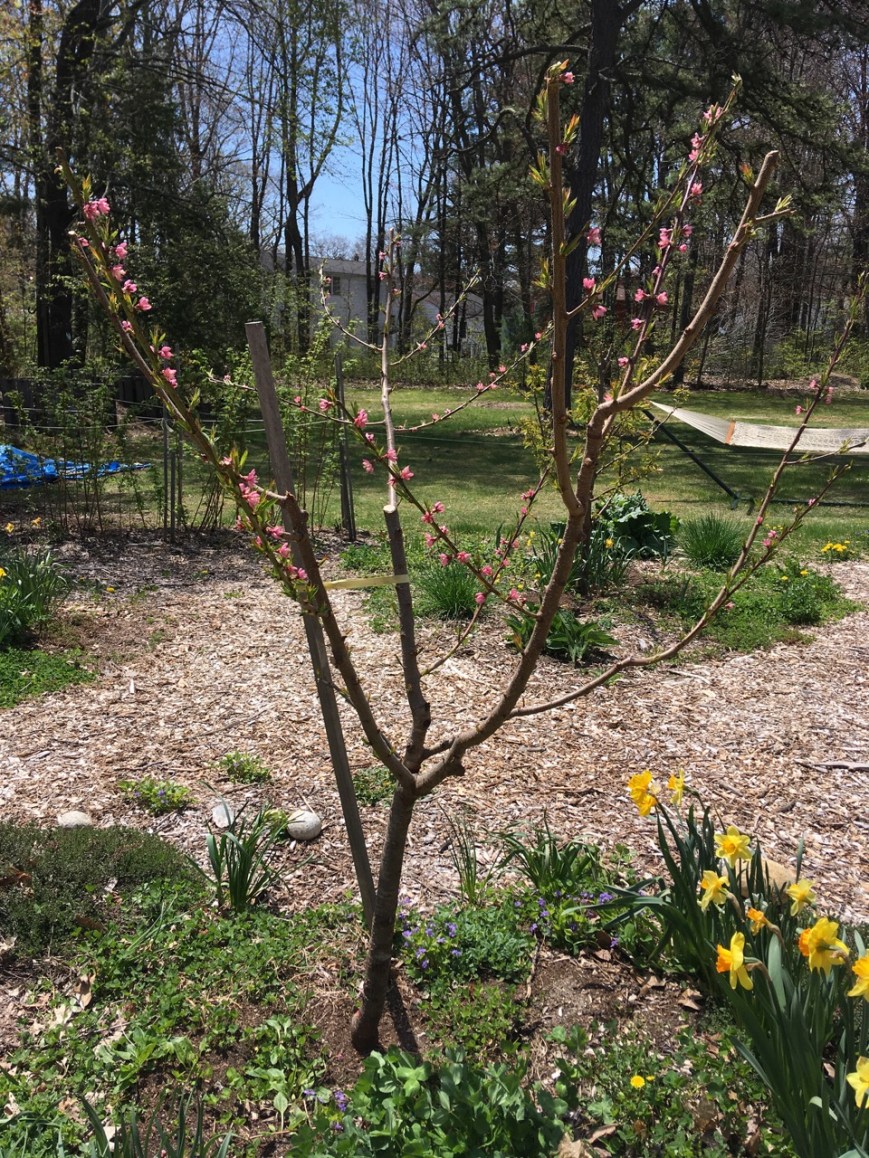
I mentioned in an earlier post that an annual activity in the spring is pruning the cherry and peach  trees–each year relearning it all over again and steeling myself to the task which seems so harsh. The peach had produced an abundance of branches, but I took out all of the ones growing toward the center, and those that were smaller than pencil size, in order to preserve a vase shape and to build a strong scaffold for future years. I was happy that I was able to leave some branches that were budding, and if all goes well we might get our first peaches this year.

Peach blossoms

Advertisement

Planting and grafting and rain

Winterberry bushNewly planted baby bushes are not as photogenic as old trees, but this week I’ve been excited to be planting bushes that have been waiting for two weeks for the ground to thaw. We’ve had so much rain, that on the few non-rain days this last week, Margy and I would be outside for as long as our energy would allow.  So far I’ve planted four witch hazel bushes and two winterberries (that is one in the photo, with a mulch from its shredded paper packing material) and three of the spice bushes.  Two more of those to go.  Margy has been planting clover in the front yard where she did a major crab-grass clearing last summer and fall.

I also took down the winter protection circular “cages” for the orchard trees, and did their first seasonal nutritional spray–a concoction I had learned about from the Holistic Orchard book. (It includes Neem Oil, Karanja Oil, a bit of dish soap, molasses, Fish Hydrolysate, Liquid Kelp, EM-1 microbes, and water, and helps to strengthen the trees own disease prevention and growth.)  The orchard trees have their green tips poking out! I am also seeing new shoots of asparagus, sea kale, licorice, rhubarb, elderberry, and lots of chives.

I haven’t had a chance to mention the apple tree grafting workshop I attended at the Resilience Hub on April 7th.  I won a ticket to the workshop in a raffle the day before at another event, along with a grafting knife.  So, do you remember learning the story of Johnny Appleseed, when you were young?  He went across the land, supposedly, planting apple trees in every town and countryside?  It was news to me to learn that the apples we eat don’t come from trees that grow from seeds.  Rather, they are created from branches-“scions”-of particular varieties grafted onto various root stock.

I did feel pretty clear on the concept of apple tree grafting before I actually went to the workshop–mostly from ordering our apple tree last year from Fedco.  But it was harder than it seemed it would be–the actual cutting of scions and root stock, I mean.  The basic idea was to form a diagonal cut on the root stock, and a matching cut on the scion of the variety we wanted, and then to form a smaller v-shape cut on each of those bare wood parts to help wed them together.  We practiced on spare wood for at least 30 minutes before we started on the root stock and scions.  When the cuts matched (the green edges of the bark needed to meet each other), we’d put them together, tape them with grafting tape, and then cut the scion wood to leave just two buds to grow.  I am summarizing a bit here.

In the end, I brought home four apple trees that I had grafted, albeit poorly. My chosen root stock was M-111, a semi-dwarf variety, and my scions were Black Oxford and Blue Pearmain. I also learned that they could be grown in a kind of nursery bed, and transplanted to a permanent location next year.  So this week, I dug them into our newly designated nursery bed, the one unused circular bed in the orchard, in which I am also growing peas, kale and lettuce (in the photo, the bamboo and string framework are there on the left to support snap peas, and the four apple trees will go in the area to the right.) Now we wait and see if any of them grow!  And just for fun, I brought home some more scion wood, to try and graft it onto our ornamental crab apple trees–sometimes that works, and you can get edible fruit from the new branches. Now if it would just stop raining every day.Pea supports


Almost

Witch Hazel

Our bushes arrived from Fedco this week, and today we were going to plant them.  Last winter, we ordered four witch hazel bushes, five spicebushes, and two winterberries.  We wanted to expand our mini-forested edges in the back and on the side, and thus we needed species that grew well in the shade of other tall trees (which these do).  We hope they will enhance the privacy of our yard, and also provide food for pollinators, butterflies, and birds, as well as beautiful flowers and berries to see.

We had done some preliminary work before we ordered them, to decide where they might be planted, and today Margy and I went around to confirm the spots, to make sure each bush would have enough room when full grown.  We marked them with flagging and markers. We unpacked the box of young plants and were delighted that they were more than just sticks with roots. They looked healthy, and we stored them in dampened shredded paper.  The photo is our witch hazel bushes.

The land in our yard has been soggy and wet for the last week.  But, when I tried to dig holes, I could only go down about five or six inches before I hit a barrier of ground frozen solid.  I guess we aren’t planting these today!  Still, it was in the 60s out there, and it was marvelous to just be outside in the sun–and then it was too hot, so we pulled out our shade umbrella for our patio table.  We turned to other tasks in the garden, and listened to birds singing, and I dug up the old kale plants that had overwintered.  Before I came in, I noticed that the holes I had dug were now filled with water.  I am curious as to whether the holes I dug will thaw faster than the undug ground.  We’ll see.  We are expecting no freezes this week.

Hell Strip to Esplanade

Planting the roadside strip

Lisa & Myke at work, photo by Margy Dowzer

Last month, Margy and I were talking about the crabgrass that has overrun the lawn in so many places, including the strip between the sidewalk and the street. This strip seems to be referred to by many names–from “hell strip” to “esplanade.”  She is working on other strategies for other places, but I had the idea (after some internet research and an appreciation of what someone in our neighborhood had done to theirs) to see if hardy perennials might eventually outcompete the crabgrass and solve the problem. Then it truly would be shifting from a hell strip to an esplanade!

I started off by moving some turkish rocket from our backyard garden to the front. Turkish rocket is a fast growing perennial vegetable with beautiful yellow flowers. I had planted some last year, excited to try it, but this spring discovered that I didn’t really like the taste of the greens–they were too sharp and bitter for me.  But the flowers were amazing.  So I decided that I’d move it from the food forest to the strip.  Another friend came by and transplanted some yellow day lilies and blue cornflower that needed a new home!

I put out a call on our permaculture meet-up, and was gratified when another member, Sandi, responded by saying she had a lot of perennials that needed dividing and we could have them. That’s the thing–so many wonderful perennial flowers multiply of their own accord and expand out of the area they are originally planted.  So why not use that spreading habit to achieve a better use of the roadside space–for pollinators and for beauty. So I went out to her house and we dug up a whole bunch of plants.

That weekend, our friend Lisa was visiting, and she jumped in to help me with the transplanting effort.  And it was a big effort!  In the end, we had 24 new plants along the strip, mostly with blue or yellow flowers, which we tended to alternate.  Several patches of Siberian iris and several patches of allium; anise hyssop, heliopsis, calendula, white ruffled iris, goats beard, astilbe, mallow, and lady’s mantle.  The other day, I added some catnip–another plant that can spread, but hey, maybe it will outcompete the crabgrass, and we’ll also have catnip for the cats.  The whole thing doesn’t look like much yet–a bunch of scraggly transplants, only a few with any flowers right now–but we’ll see how it goes next summer.  If we can get a load of wood chips, we may put down some cardboard and wood chips between the plants.  But that can happen later too.  I will let you know how it goes.

IMG_7917

Asparagus Drama

Asparagus Crown

Asparagus Crowns positioned

I am trying to catch up on my blogging about all the garden excitement last week, but then we had some more drama this week.  On Saturday, I was able to plant the second asparagus bed, along the side of the garage.  (Sylvia and I had planted the first bed last Wednesday and then started digging the trench for this one.)  Saturday, I finished digging the trench–which also involved pulling out lots of big and small rocks.  Then I added compost and a bit of rock phosphate and wood ashes.  I positioned the crowns on little mounds, spreading out their roots in a star shape around the center.

Asparagus Crowns buried

The part I couldn’t photograph was me trying to lean over the big pile of dirt on the side, to actually reach into the trench to position all those crowns.  It was pretty funny.  After that, I covered them with more compost, and then soil.  As the spikes emerge, you are meant to keep covering them so that only a couple inches show, until the soil is even with the ground again.  So this next photo is rather boring, just a trench of dirt really.  But now you know what is hiding underneath.


THEN, on Monday night we had torrential rain here in Maine.  Tuesday morning, when I woke up, this next photo was what I saw out my window.  The rain barrels and their foundations had toppled over.  I had extended the trench a couple feet beyond the garage wall, along the side of the rain barrel, thinking that the asparagus would be lovely next to it.  And all might have been well once the trench was filled in again.  But when the rains came pouring down, the soil was weakened, and the barrels were at their heaviest.  The cement block near the edge must have sunk down, destabilizing the balance of the barrels, and the whole set-up collapsed.  The cement blocks fell into the trench.

Rain Barrel calamity

I was able to pull out the blocks, and move the barrels, but will have to wait until the ground dries out a little to set them up again.  I guess I had better fill in that end of the trench before I do it too.  Margy always is reminding me that mistakes are a part of this process–that I am learning as I go along.  Yep–don’t dig a hole next to your rain barrel foundations!

Asparagus Beds

Asparagus Bed
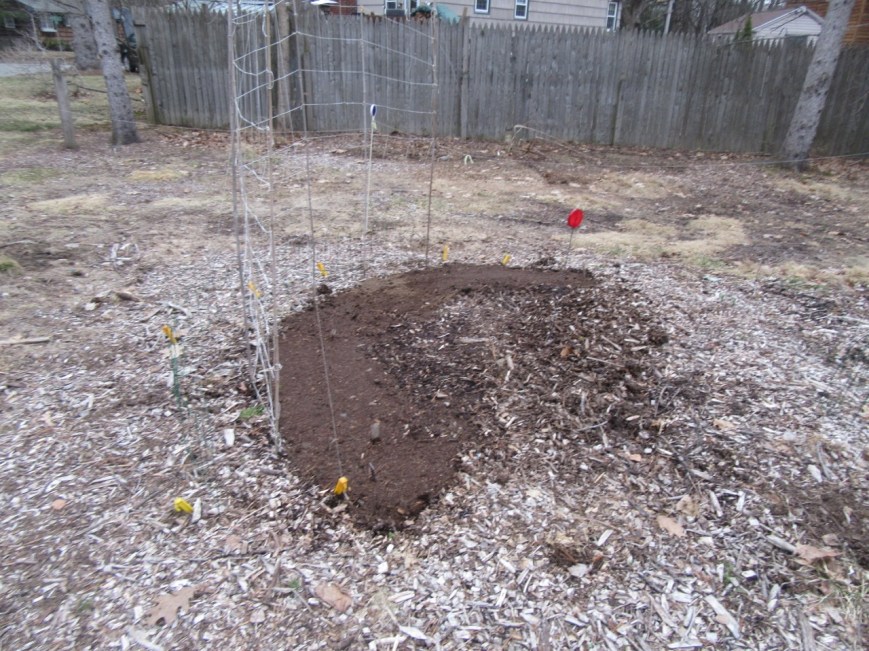
Our plants from Fedco are being delivered some time today!  And, I still have to dig the beds for the 25 asparagus plants.  I started the other day, by turning over the soil behind the house, and getting rid of any weeds there.  Saturday I dug a trench, and then put some compost in the trench.  It still needs more compost!  I also got rid of a no longer used drainage area filled with small stones and dirt–I moved the stones and dirt to under our water spigot.

Aparagus Bed part 2My understanding is that for asparagus crowns, you make a mound in the middle of the trench, and then position the roots around it, each crown about a foot apart, and cover with a couple inches of soil, gradually filling the trench as the small plants grow, keeping a couple inches of shoot exposed.  This particular bed has room for about 12 of the plants–so today I will try to dig another bed near the garage.

I am feeling a little bit panicked and excited about all the plants to plant:  along with 25 asparagus crowns, there will be an apple tree, a peach tree, two blueberry bushes, three hazelnut bushes, (those garden beds have been ready since last summer).  Also a mulberry tree which we hope to put further back in our yard.  Also a licorice plant, and 3 golden seal plants which will go into pots until frost danger is past.  Our friend said we could put them in her greenhouse for a few weeks.

So, not much time to write, but I wanted to make a log of the garden’s progress. Now out to dig for a while before going to the office.